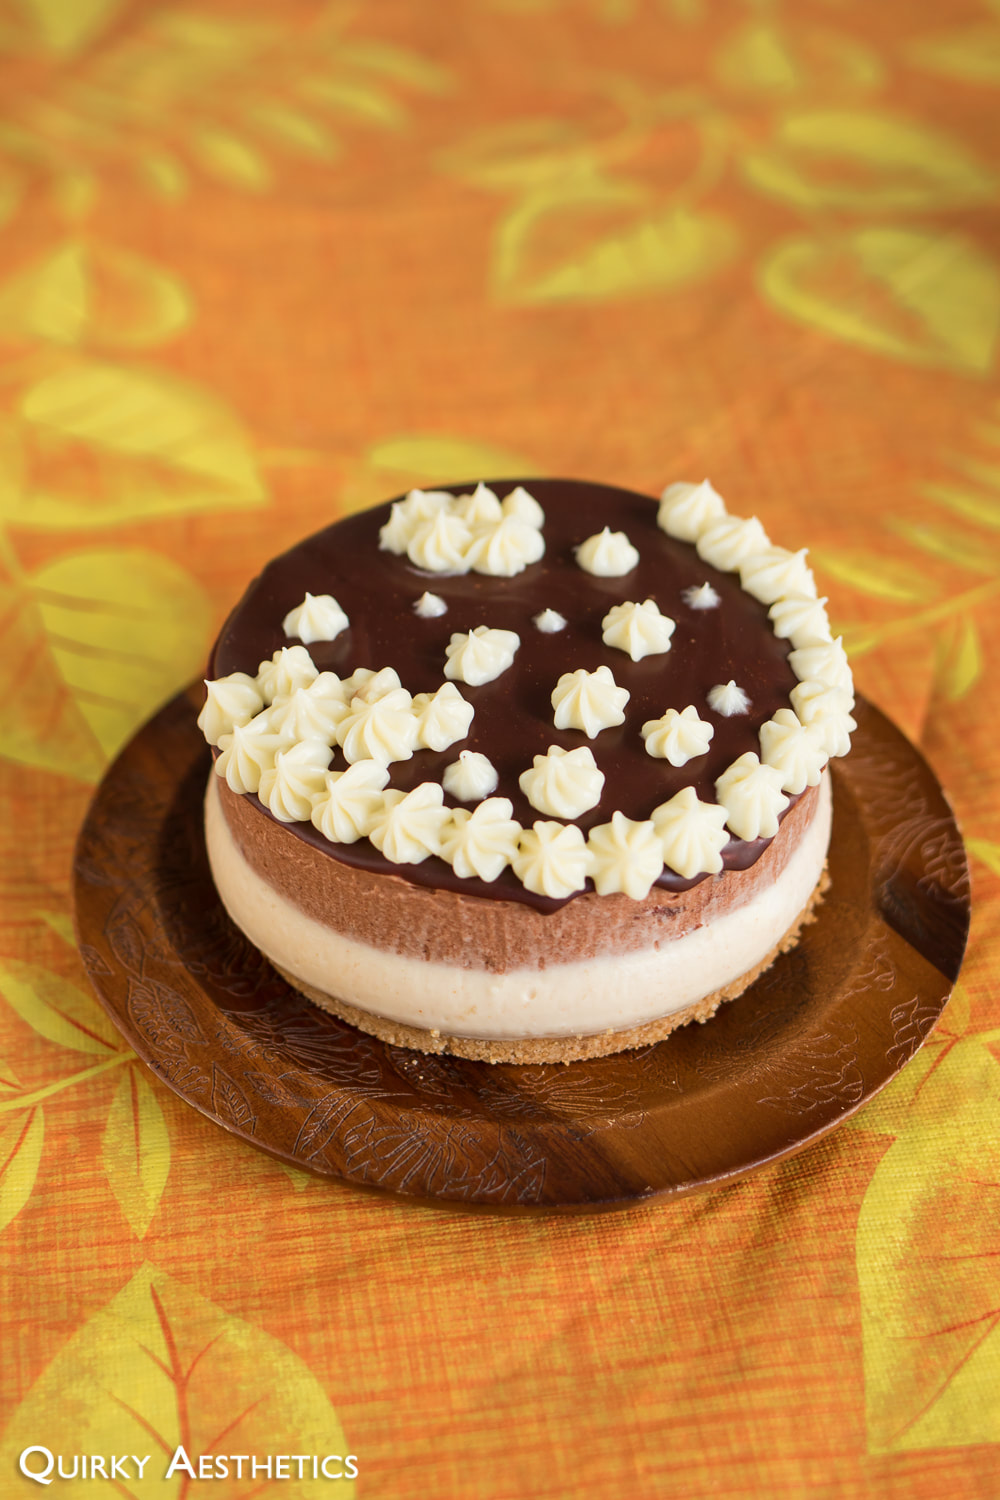
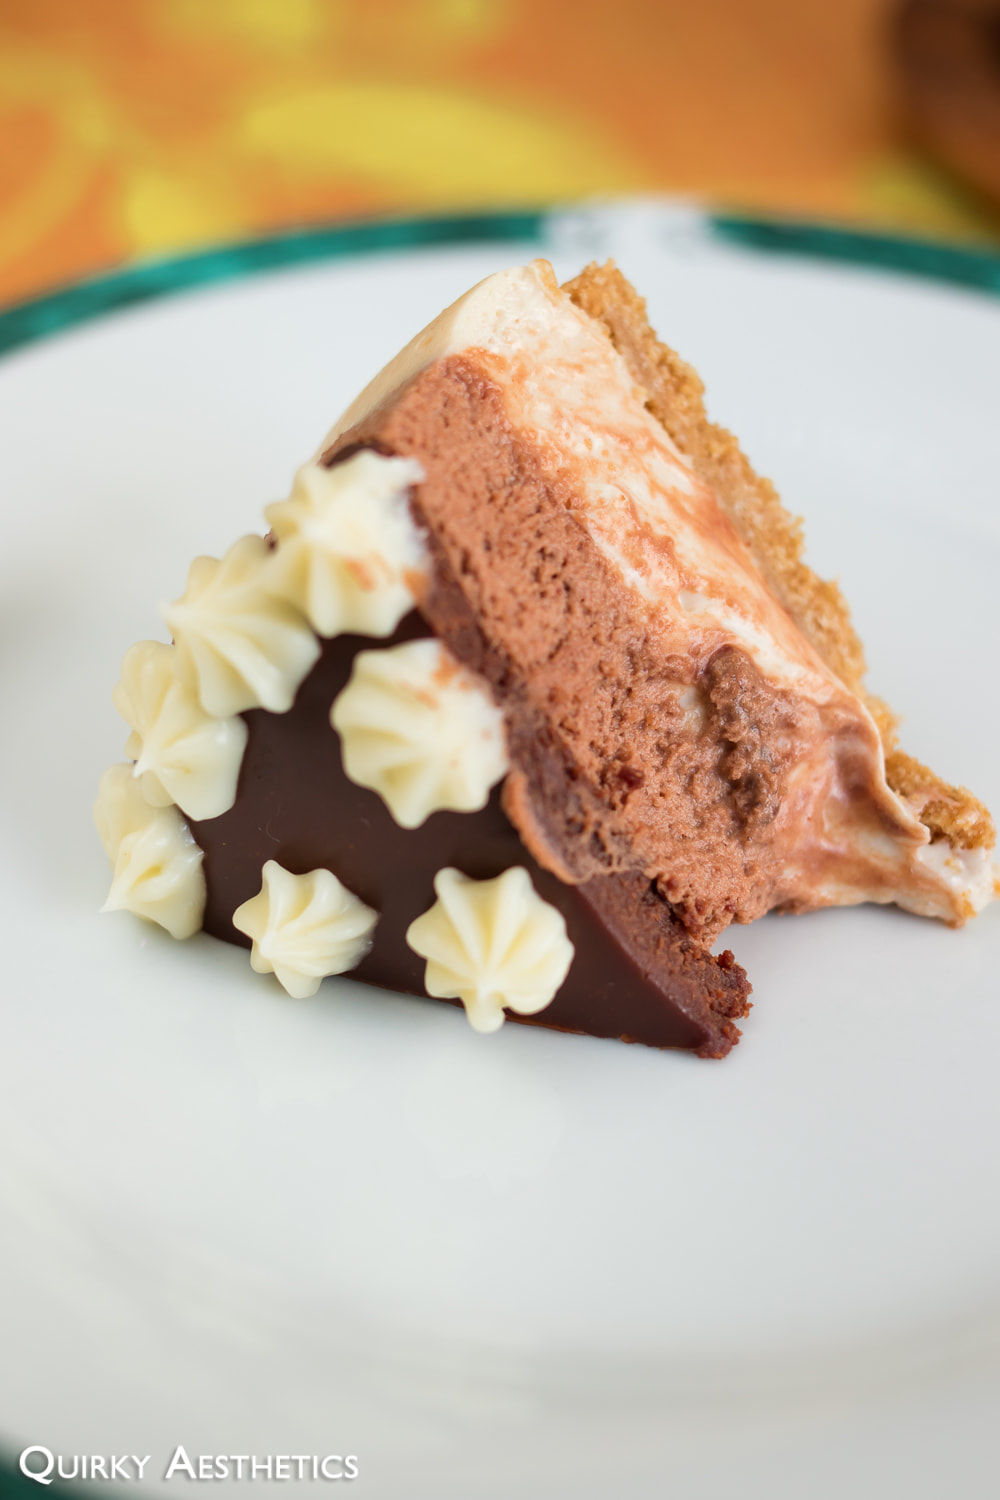
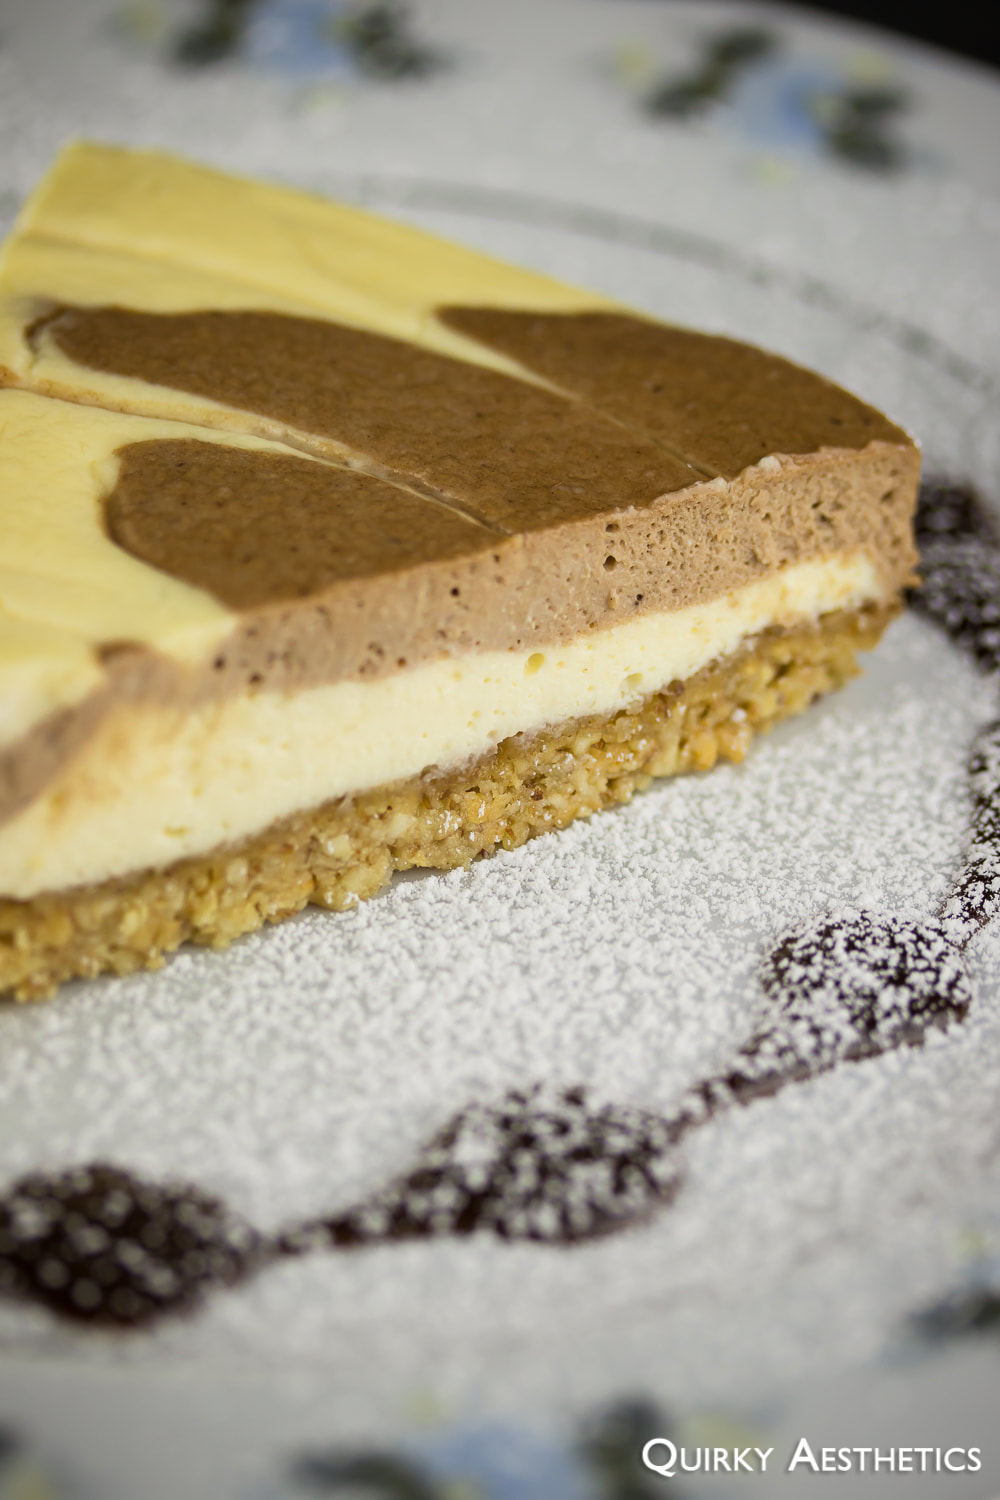
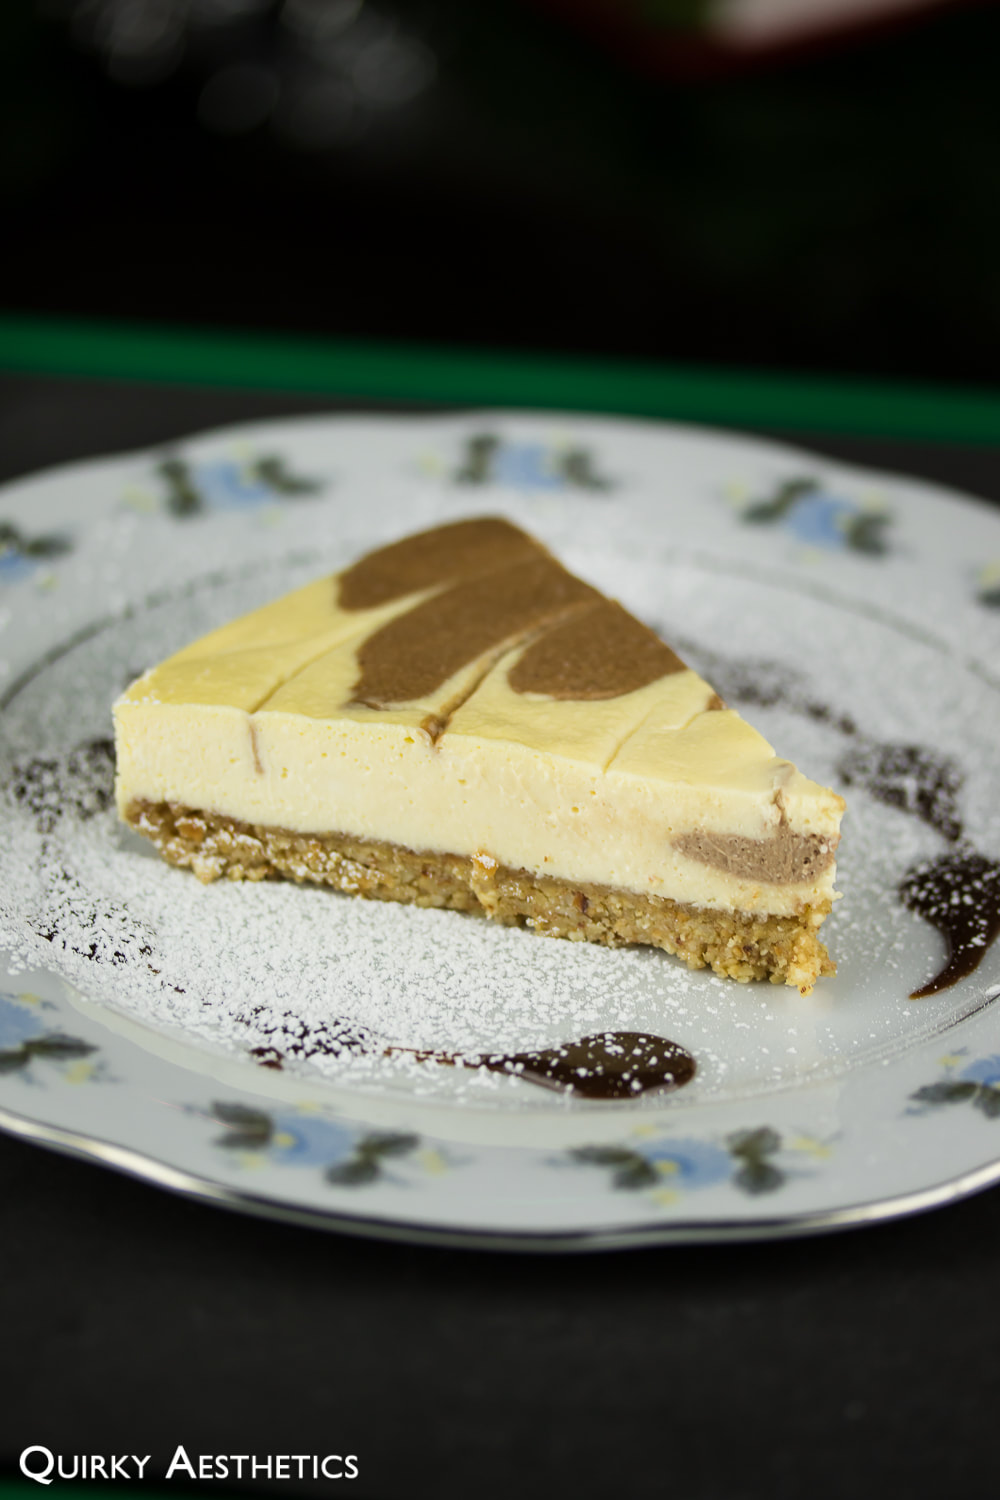
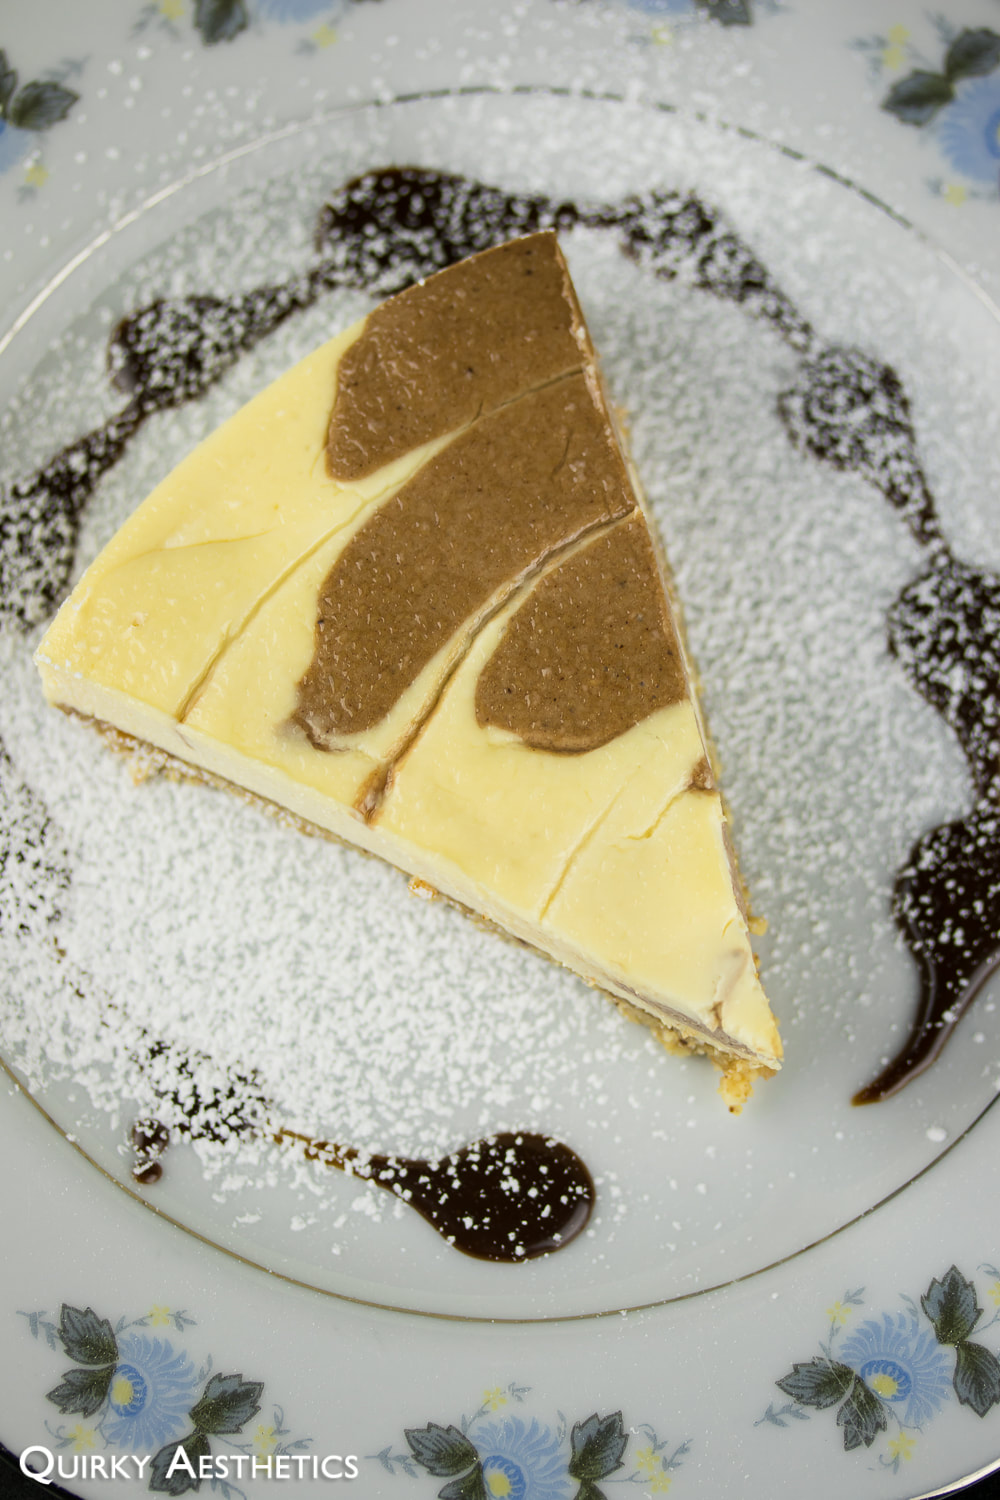
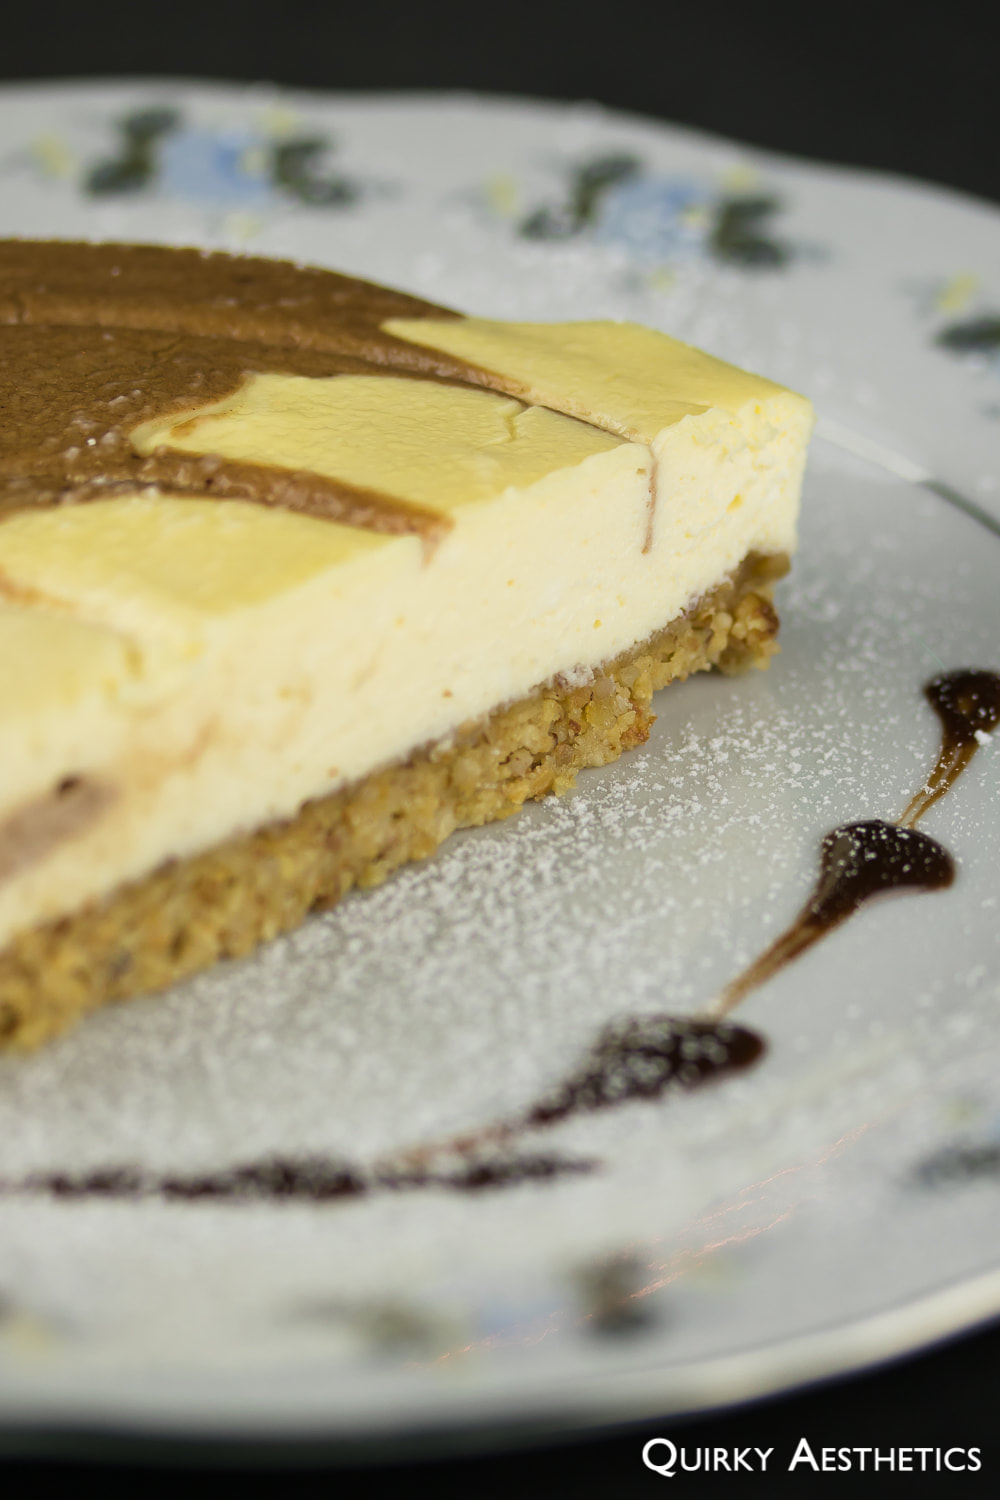
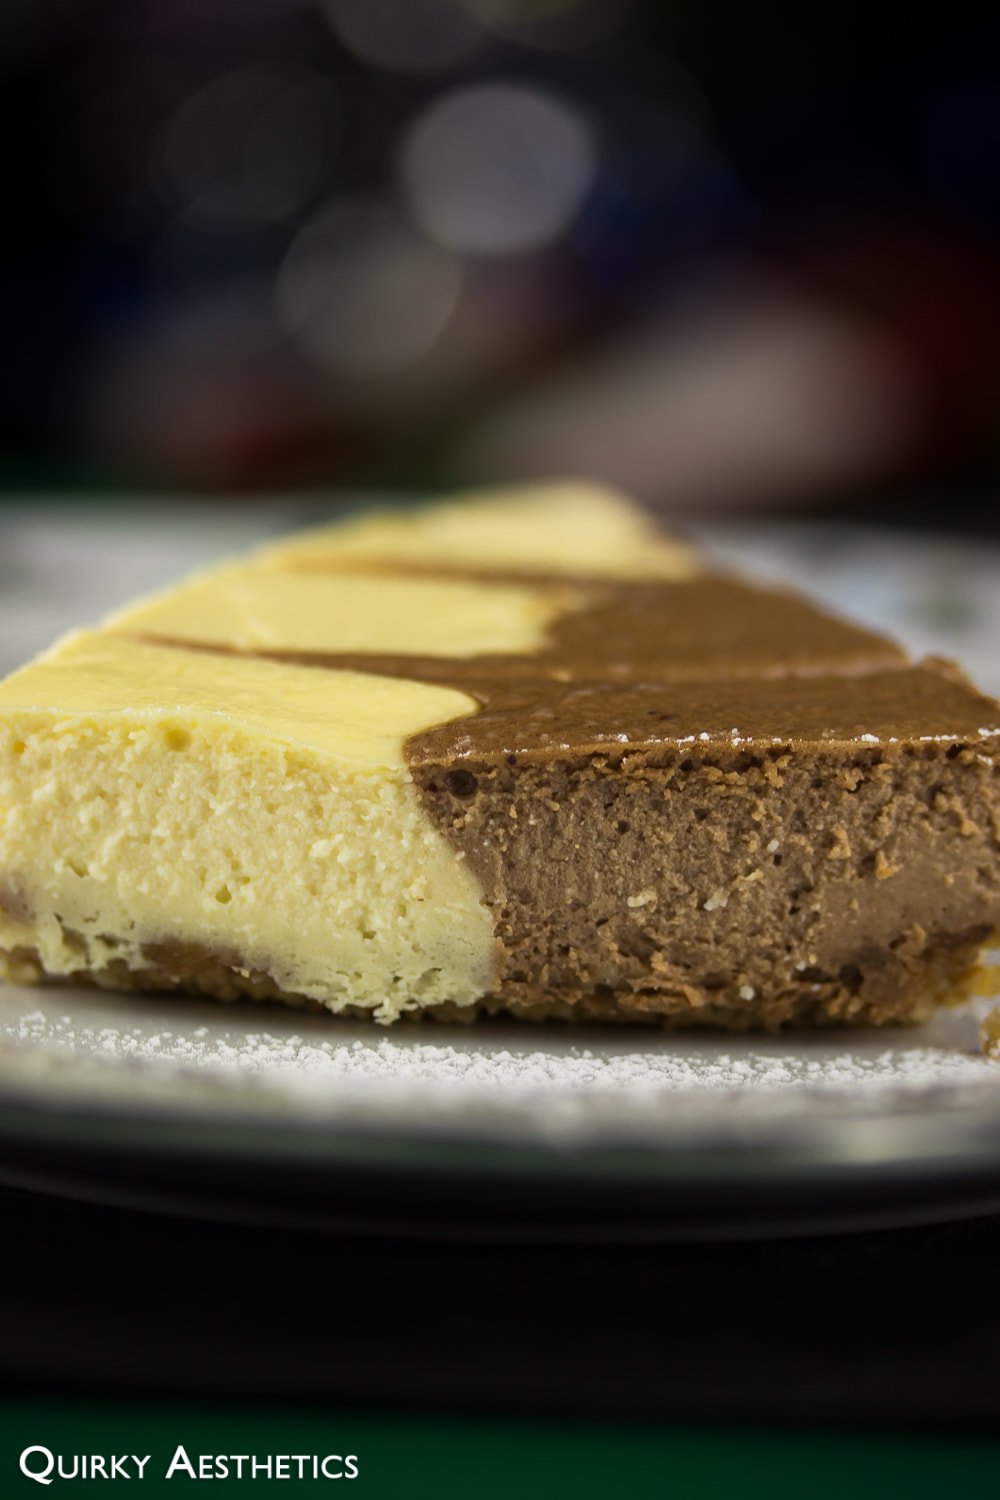
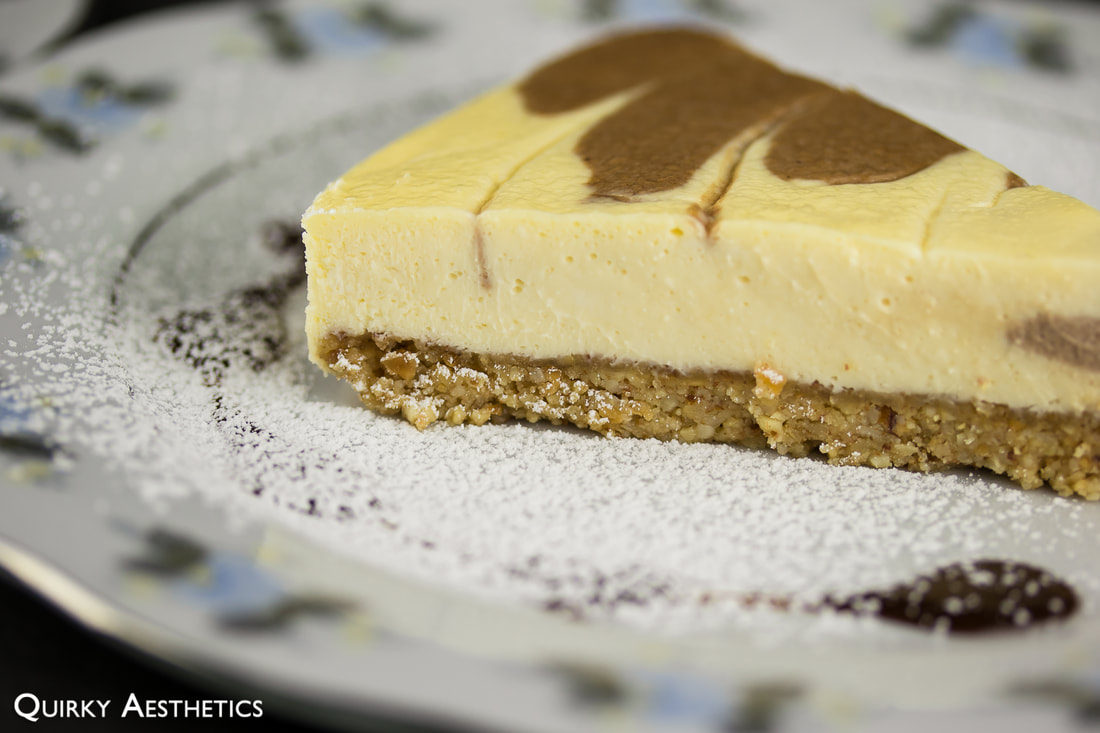
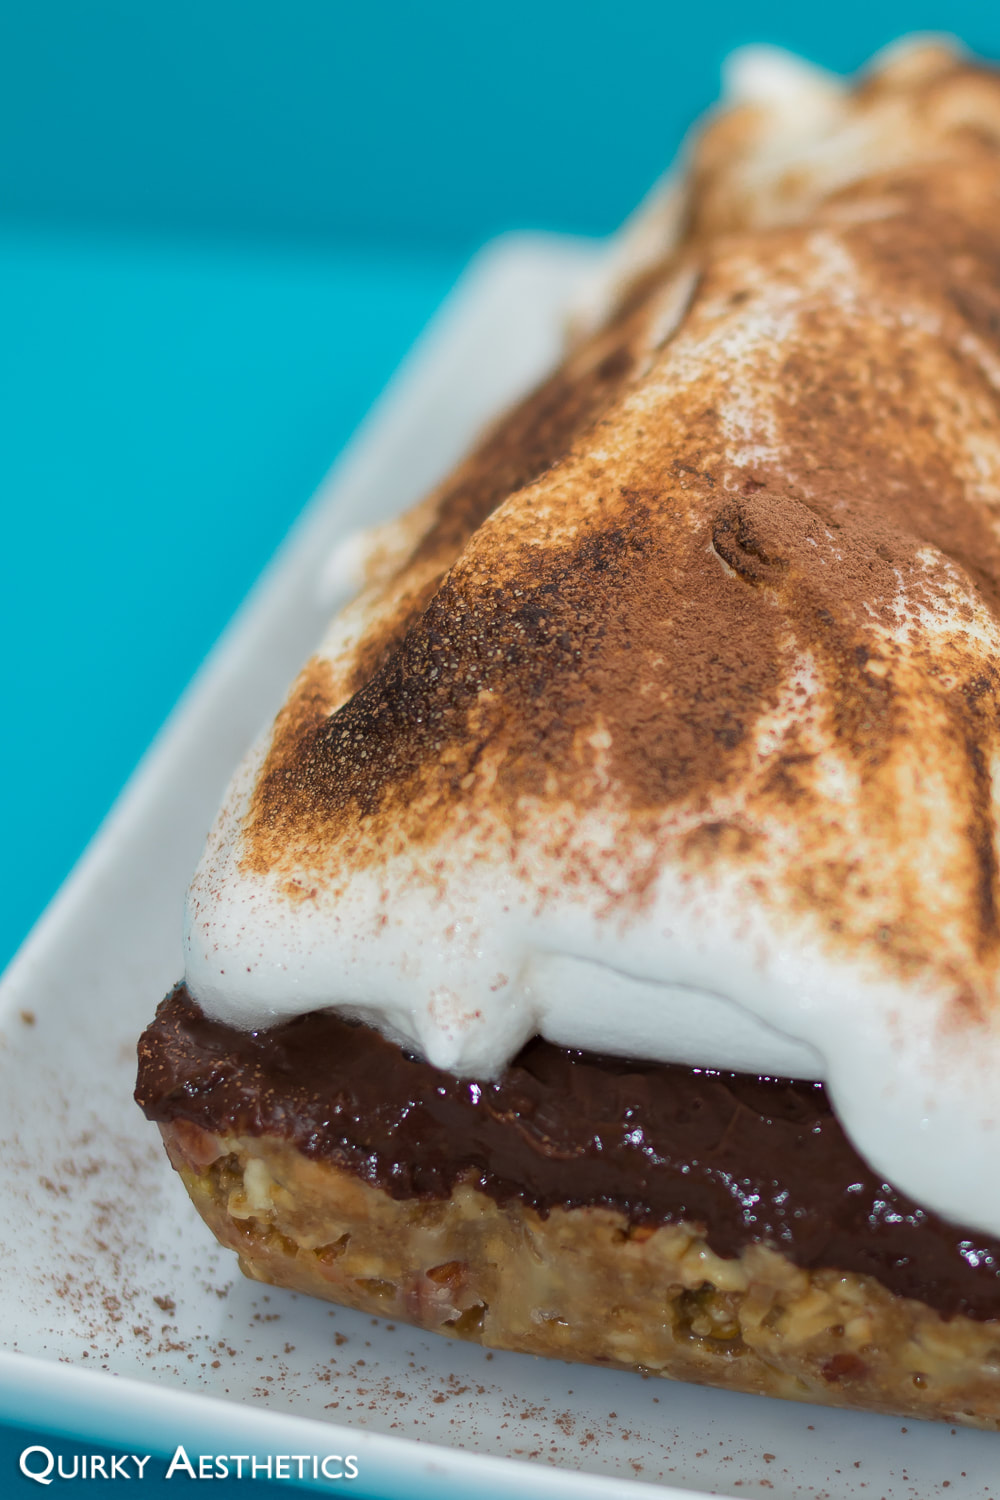
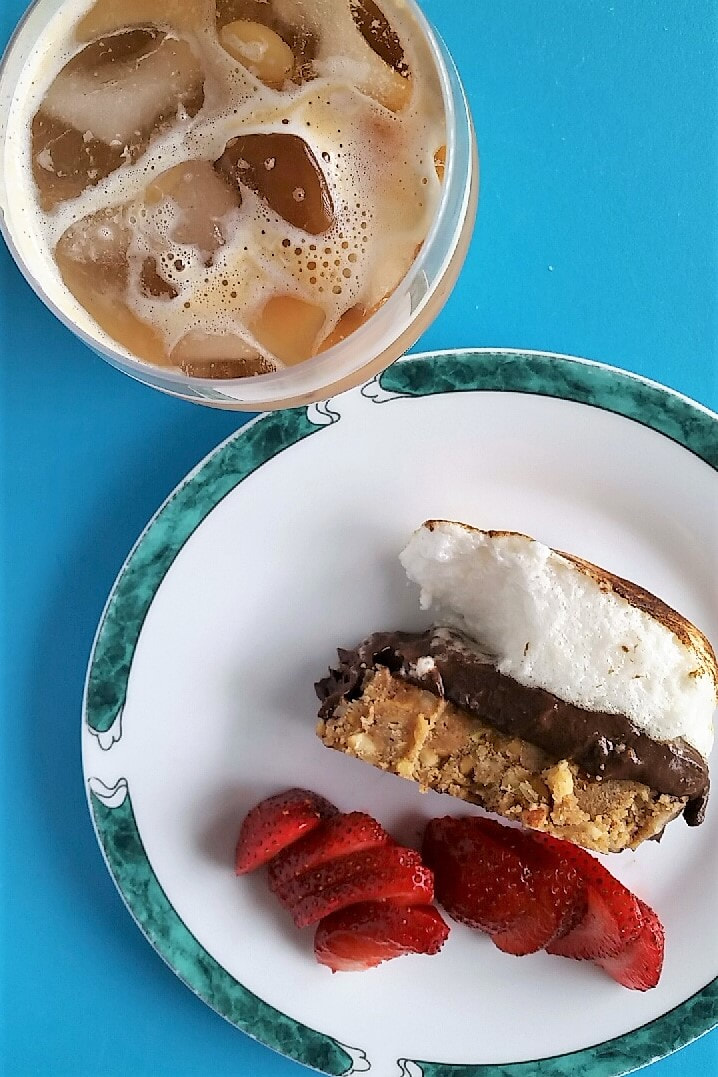
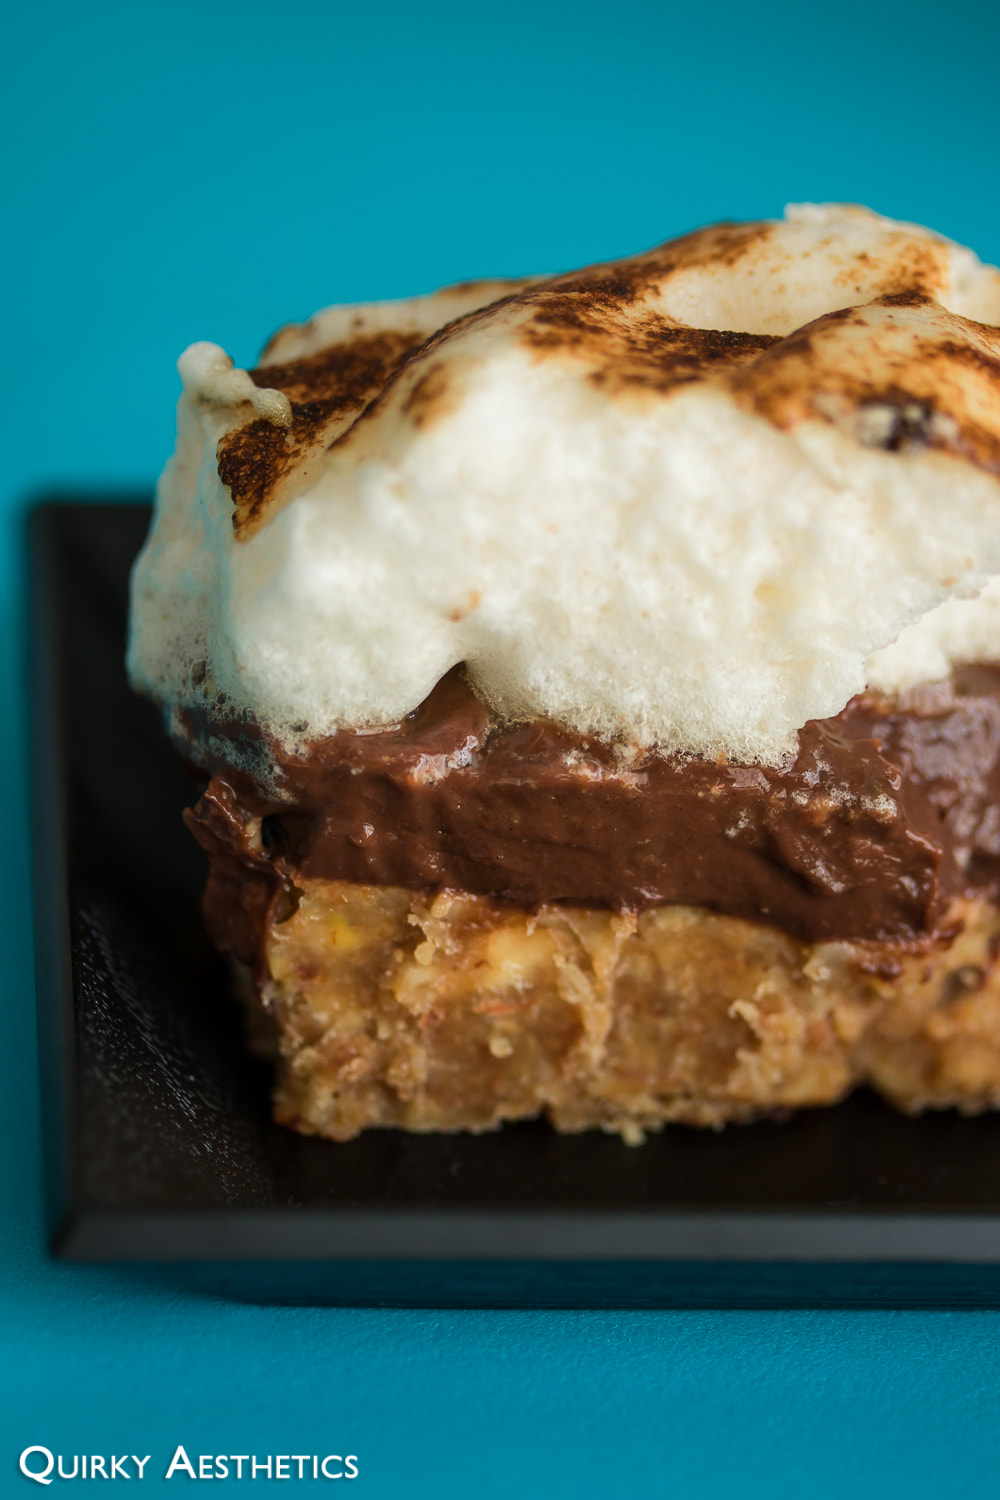
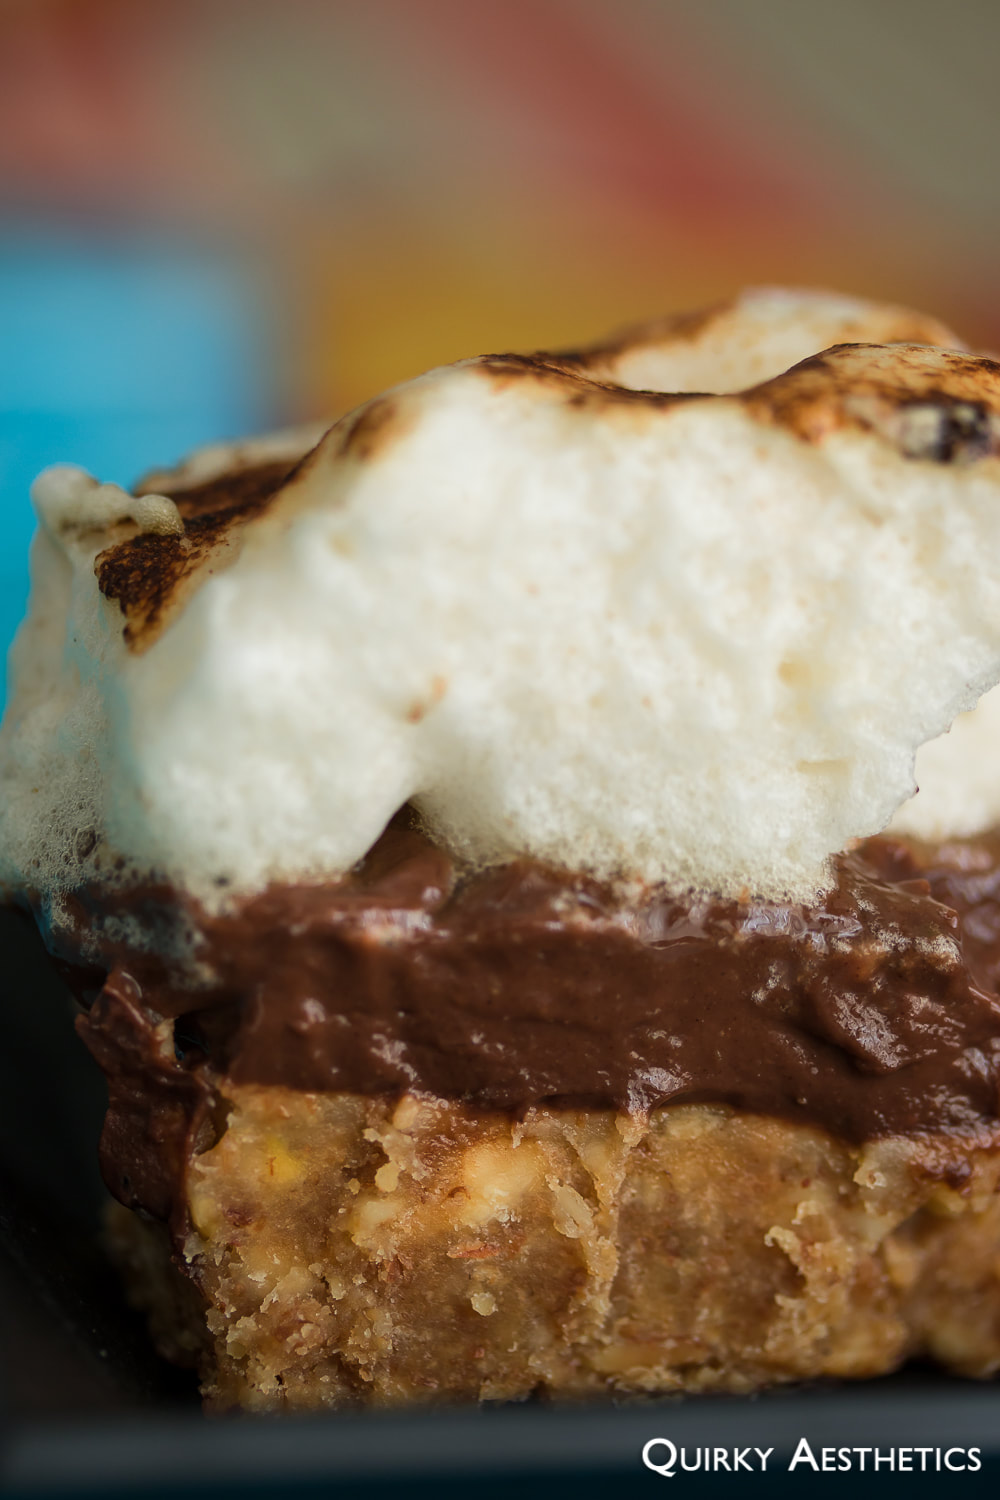
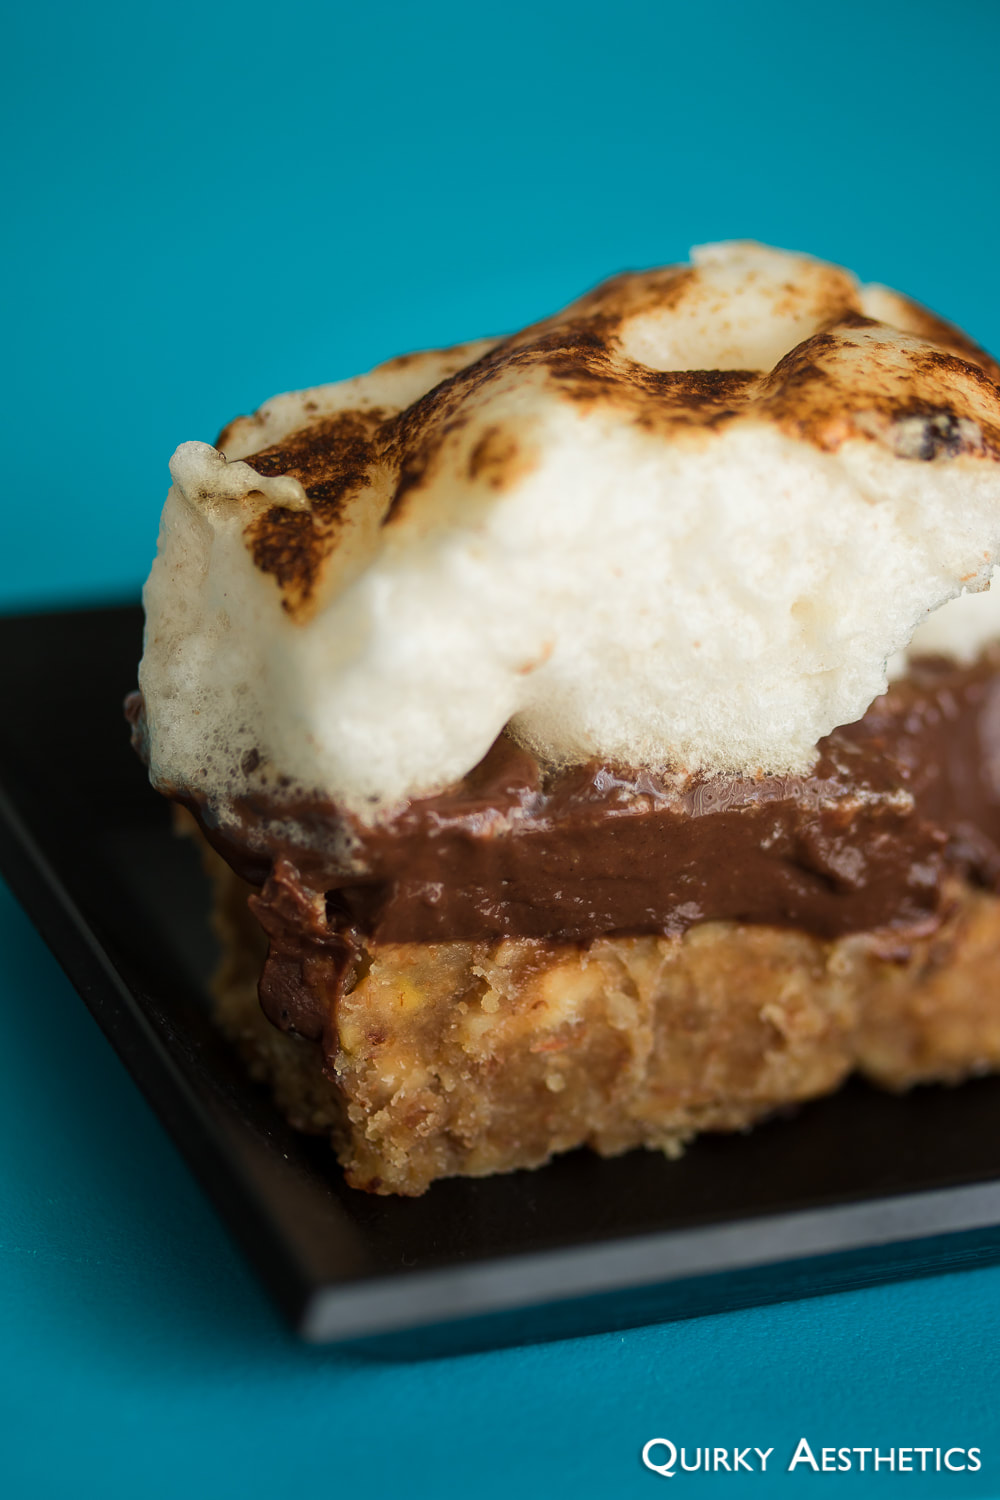
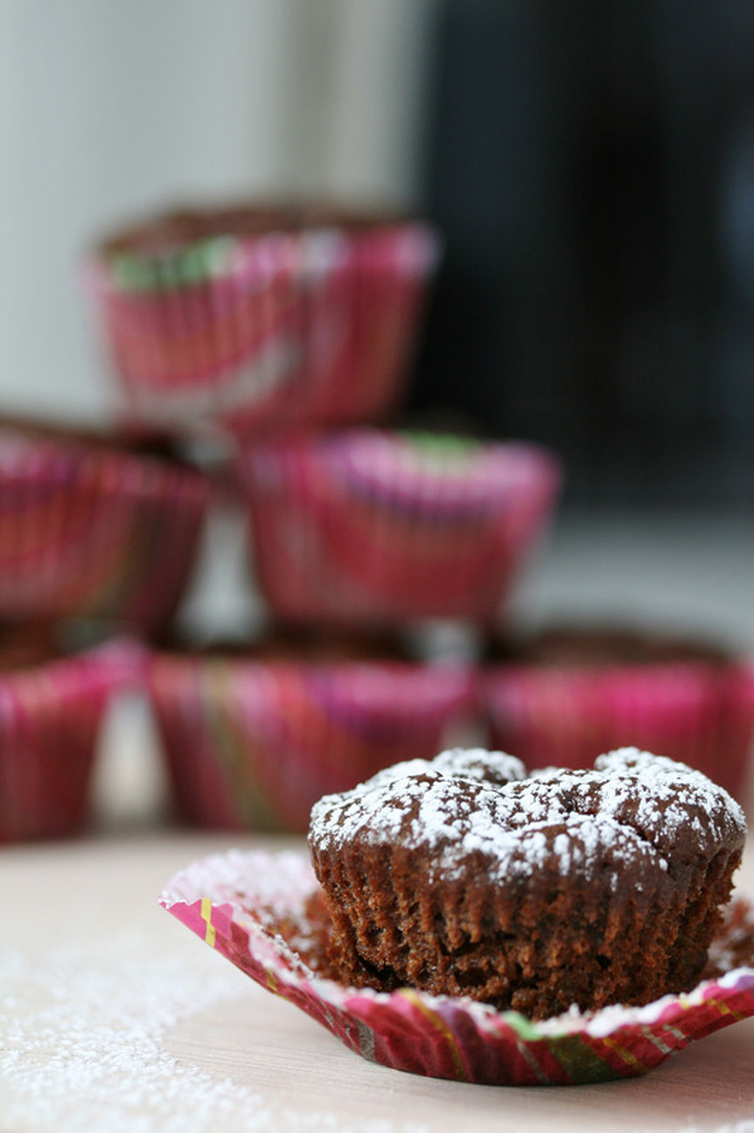
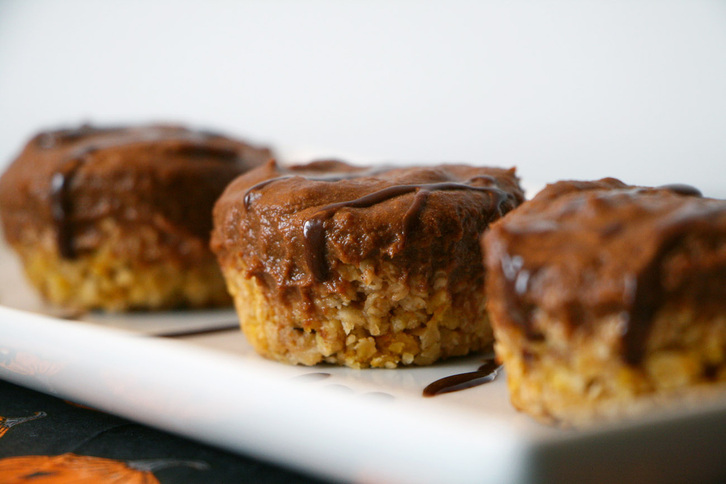
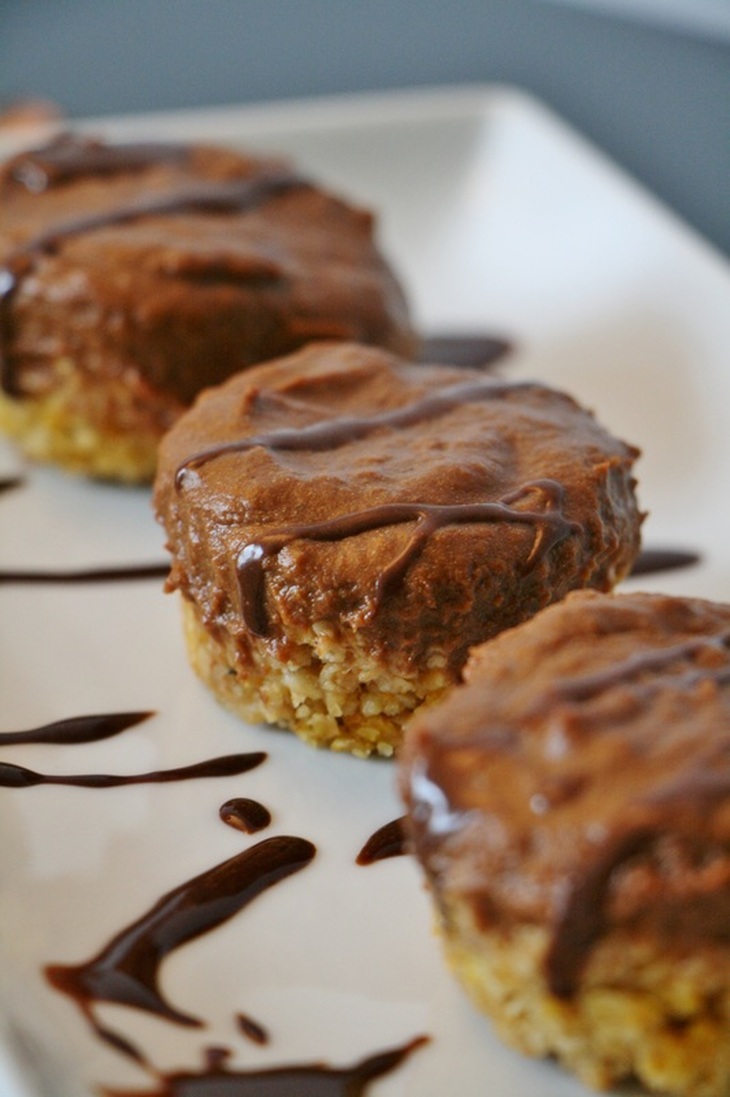
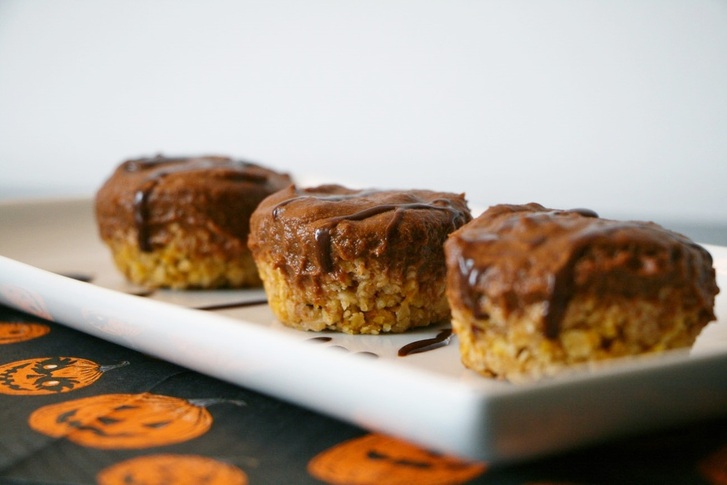
Have you ever wondered how Reese's Cups would taste in cake form? Chocolate and peanut butter - often fondly termed "PB" for short - is a classic combination, so classic that it was only fitting that my first venture into the realm of ring molding commenced with a cake comprising of such components.
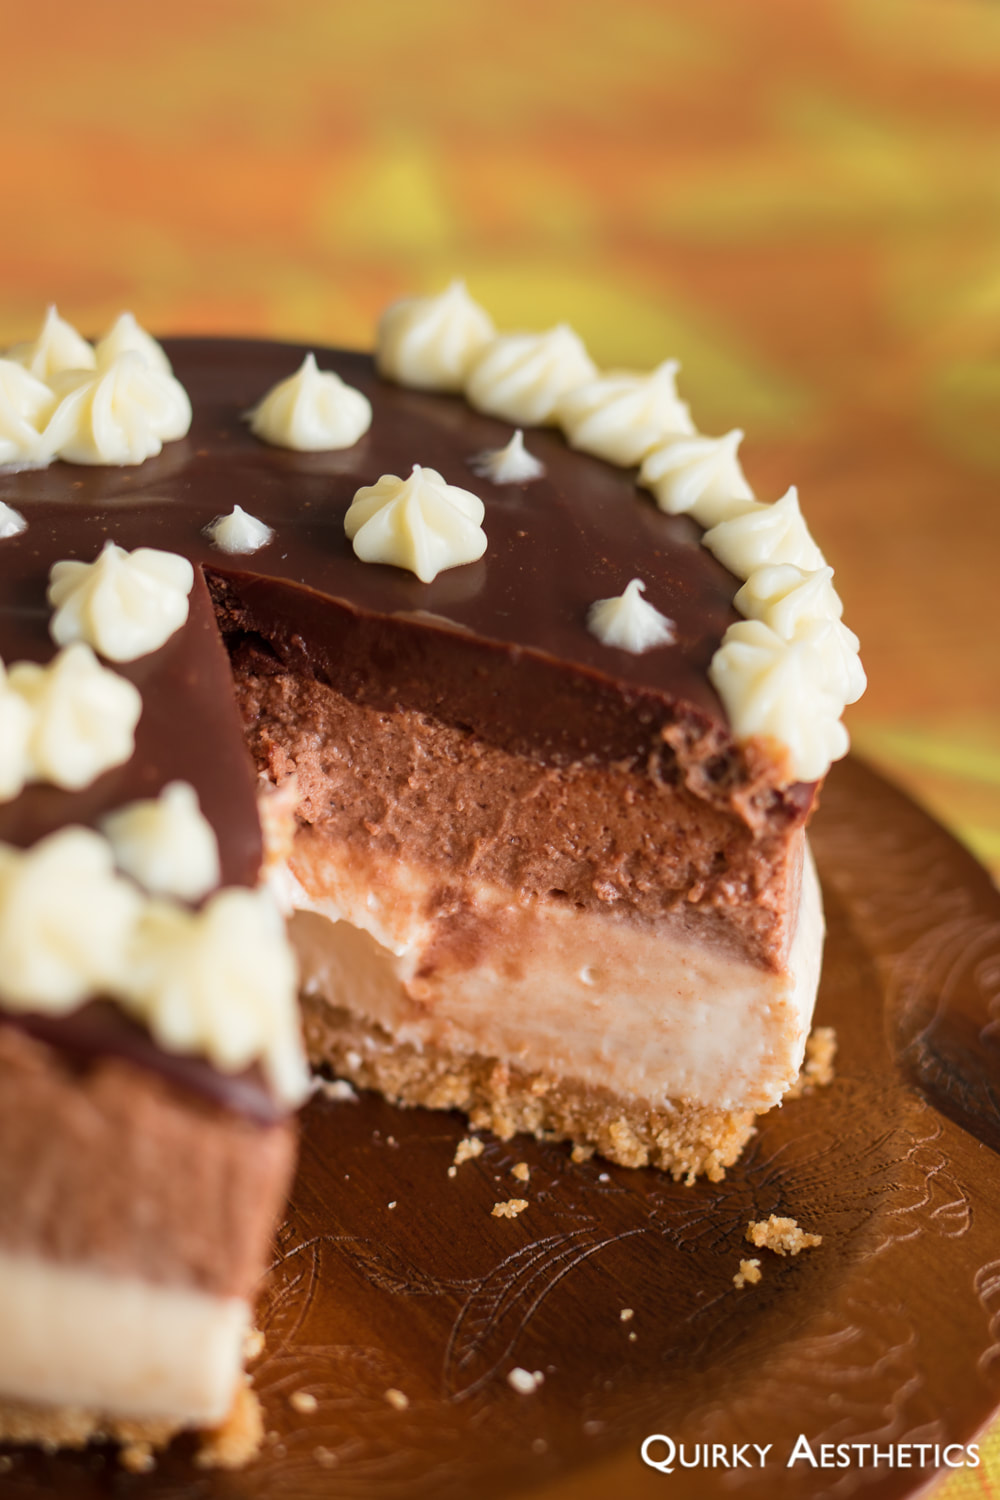
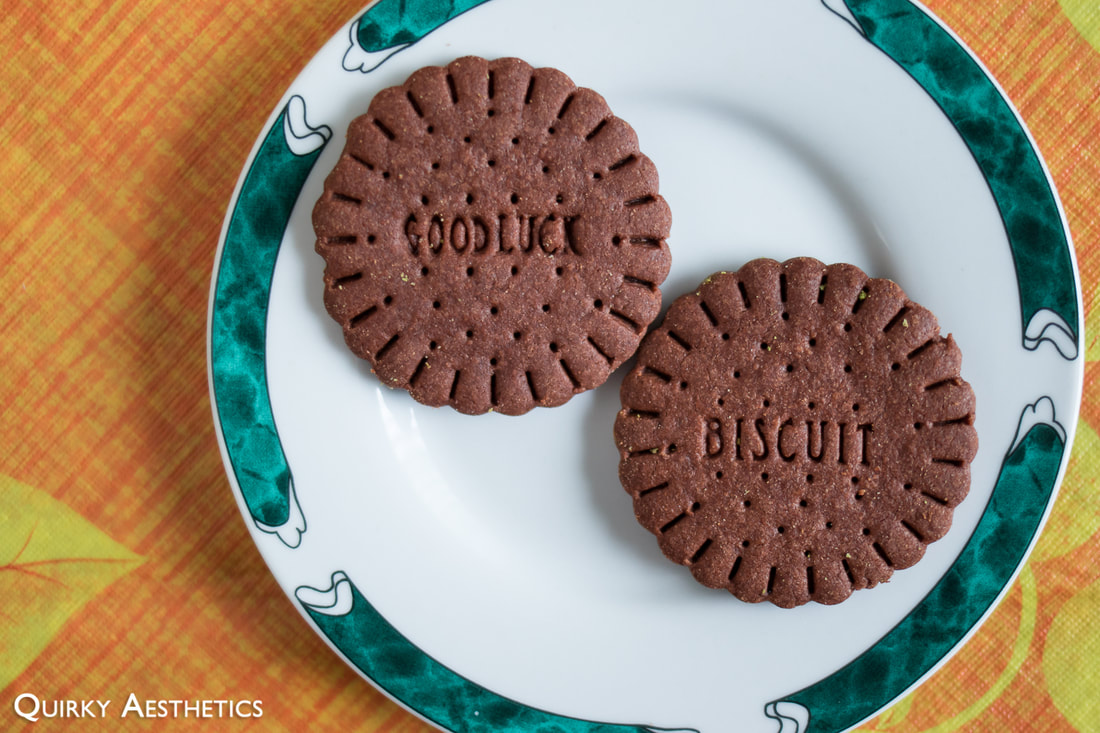
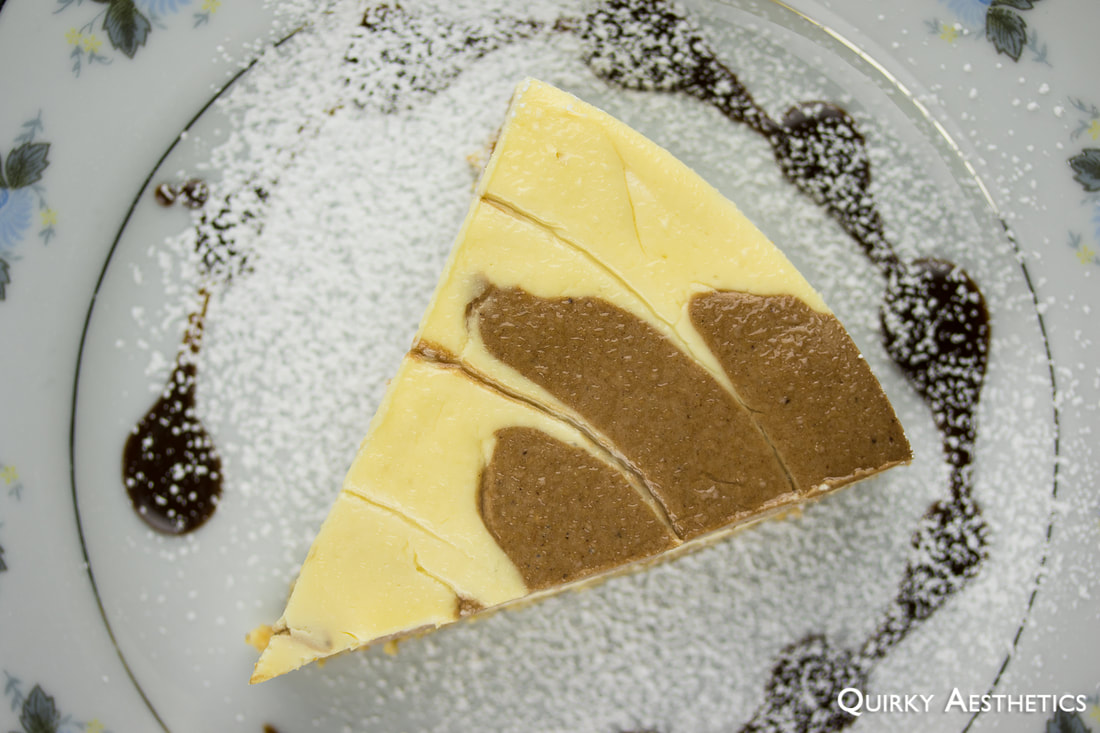
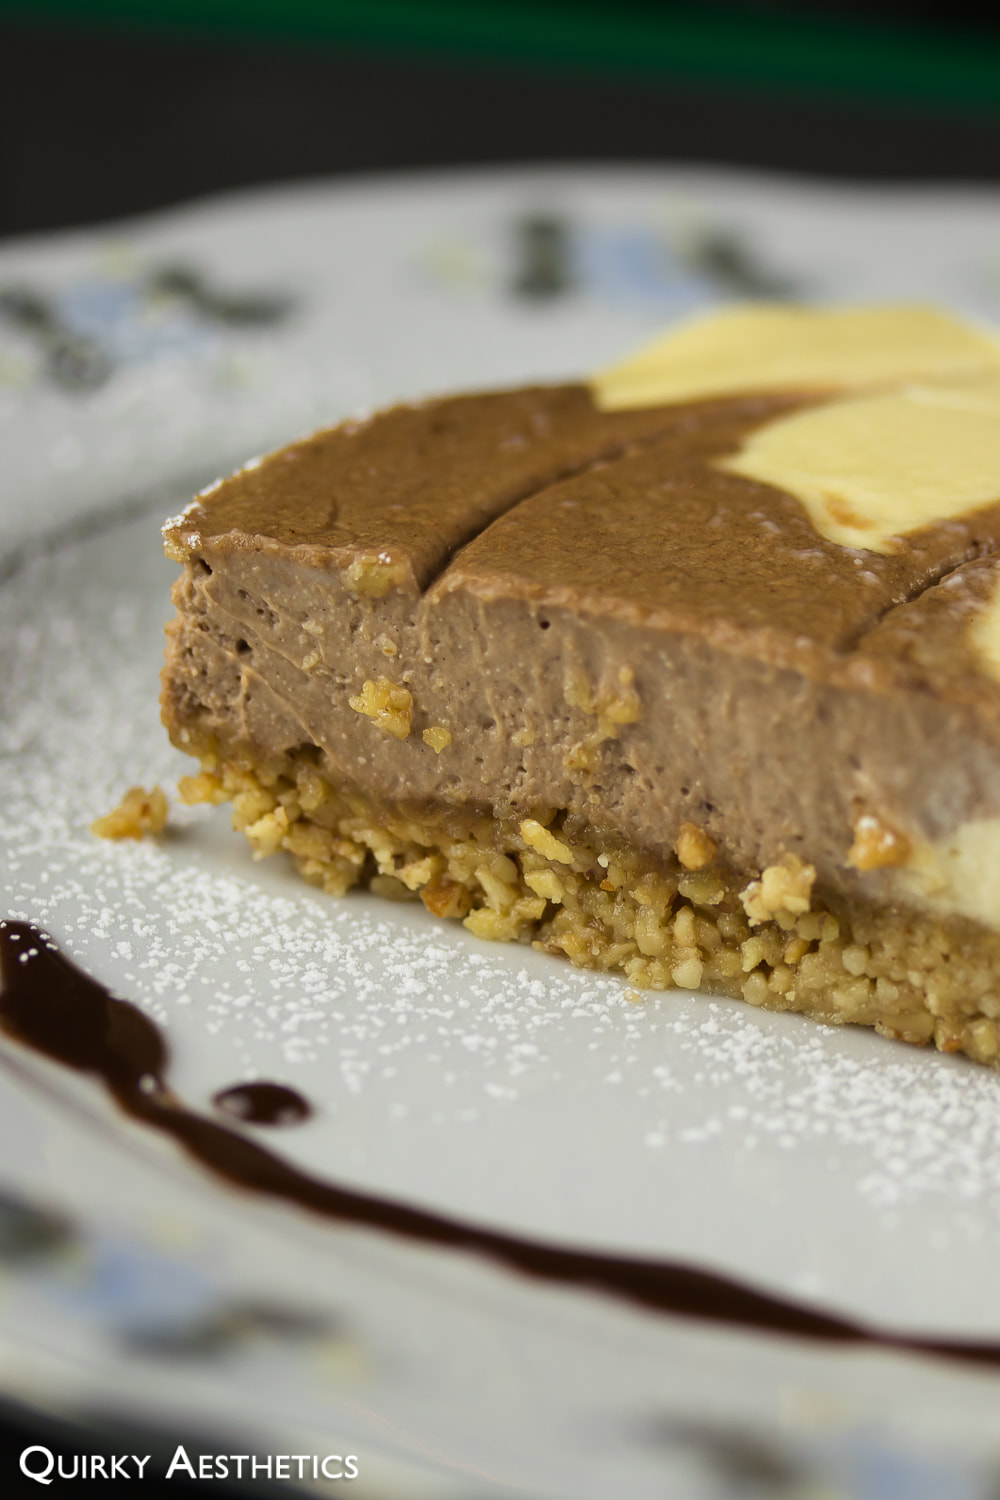
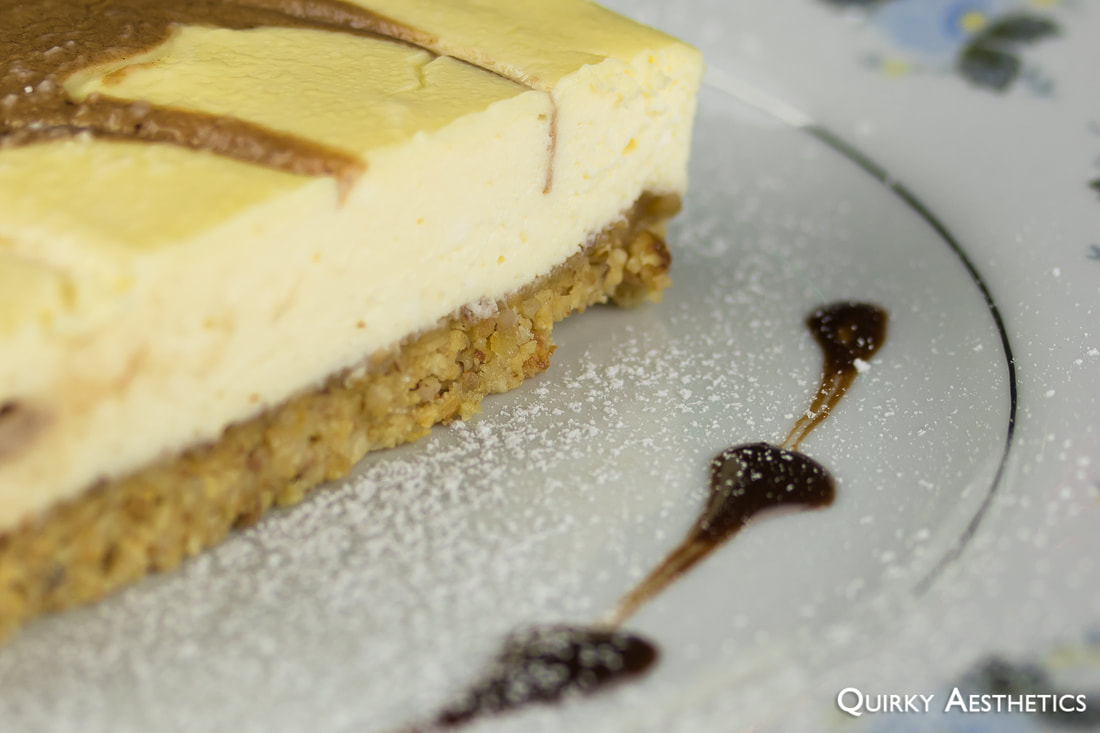
I first resorted to SKU, the destination that has yet to falter once when conjuring up last minute dinner ideas. My fingers, or eyes, rather, fell upon several recipes, though chocolate wafer cookies weren't ready available in the house. An image of a layered cake with distinct tone differences had materialized in my mind, and the conceptual format adopted a no-brainer, albeit long-winded, no-bake process.
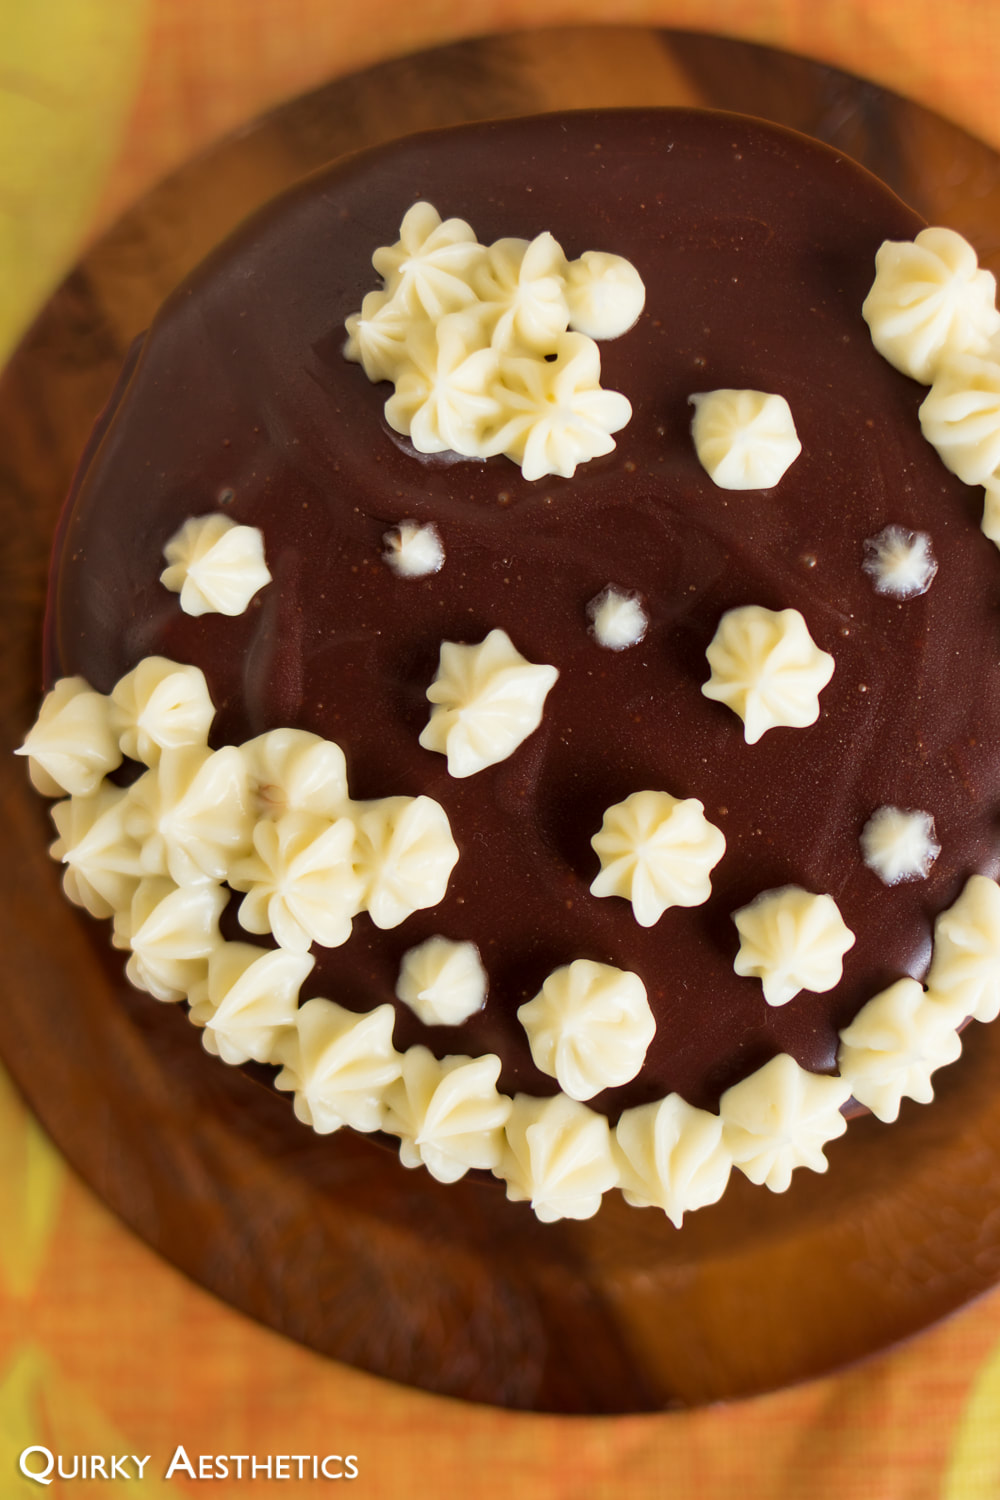
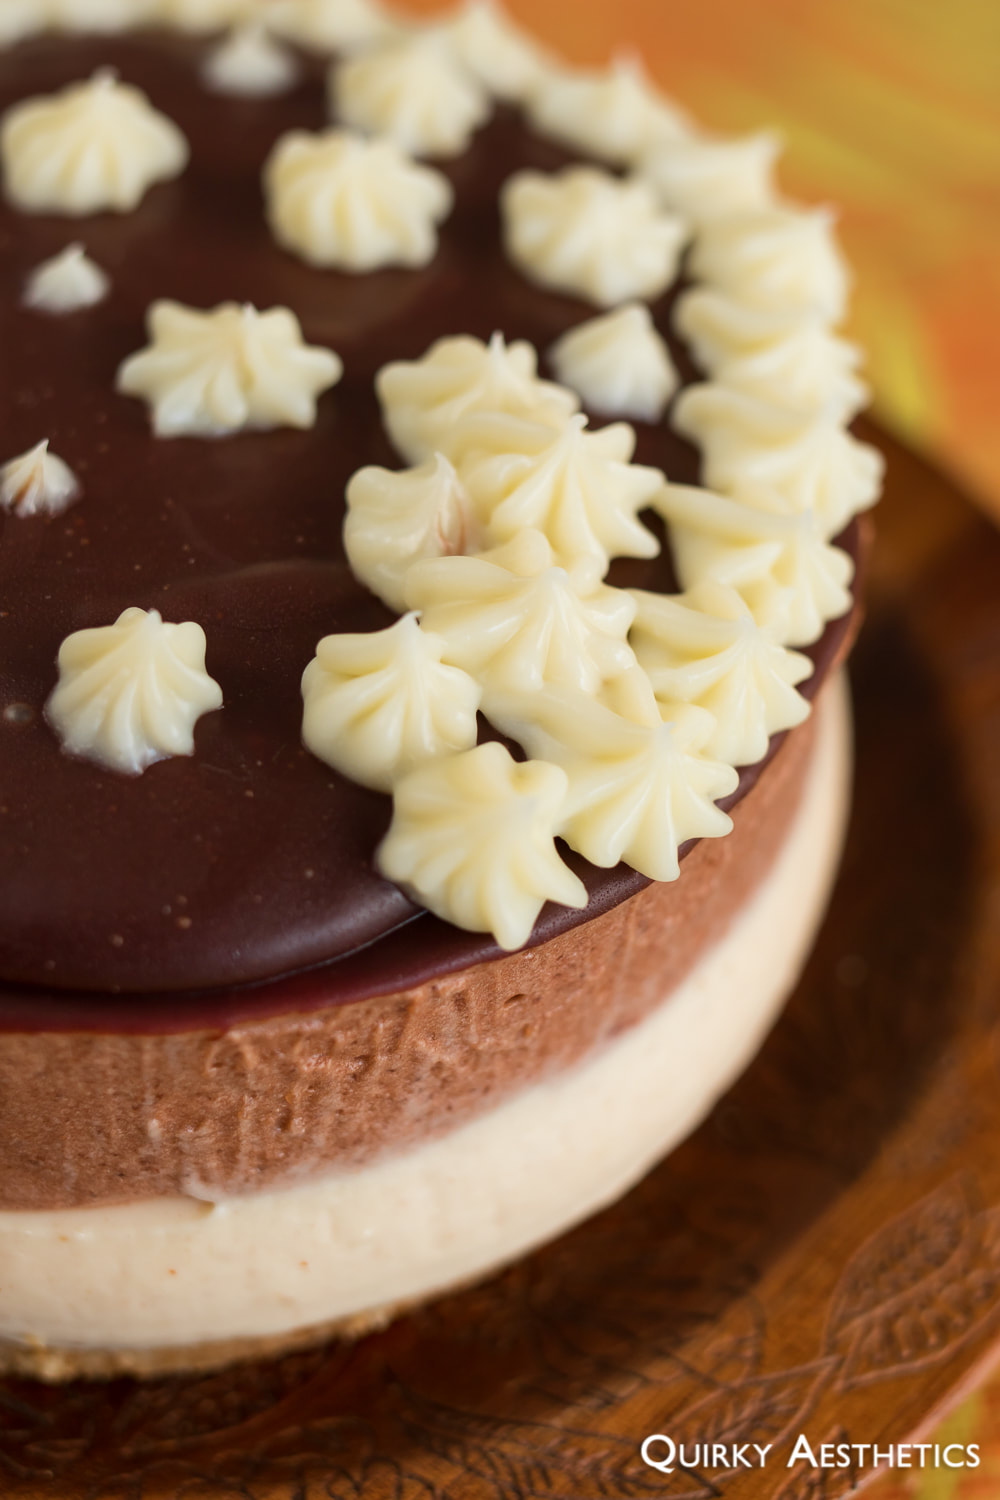
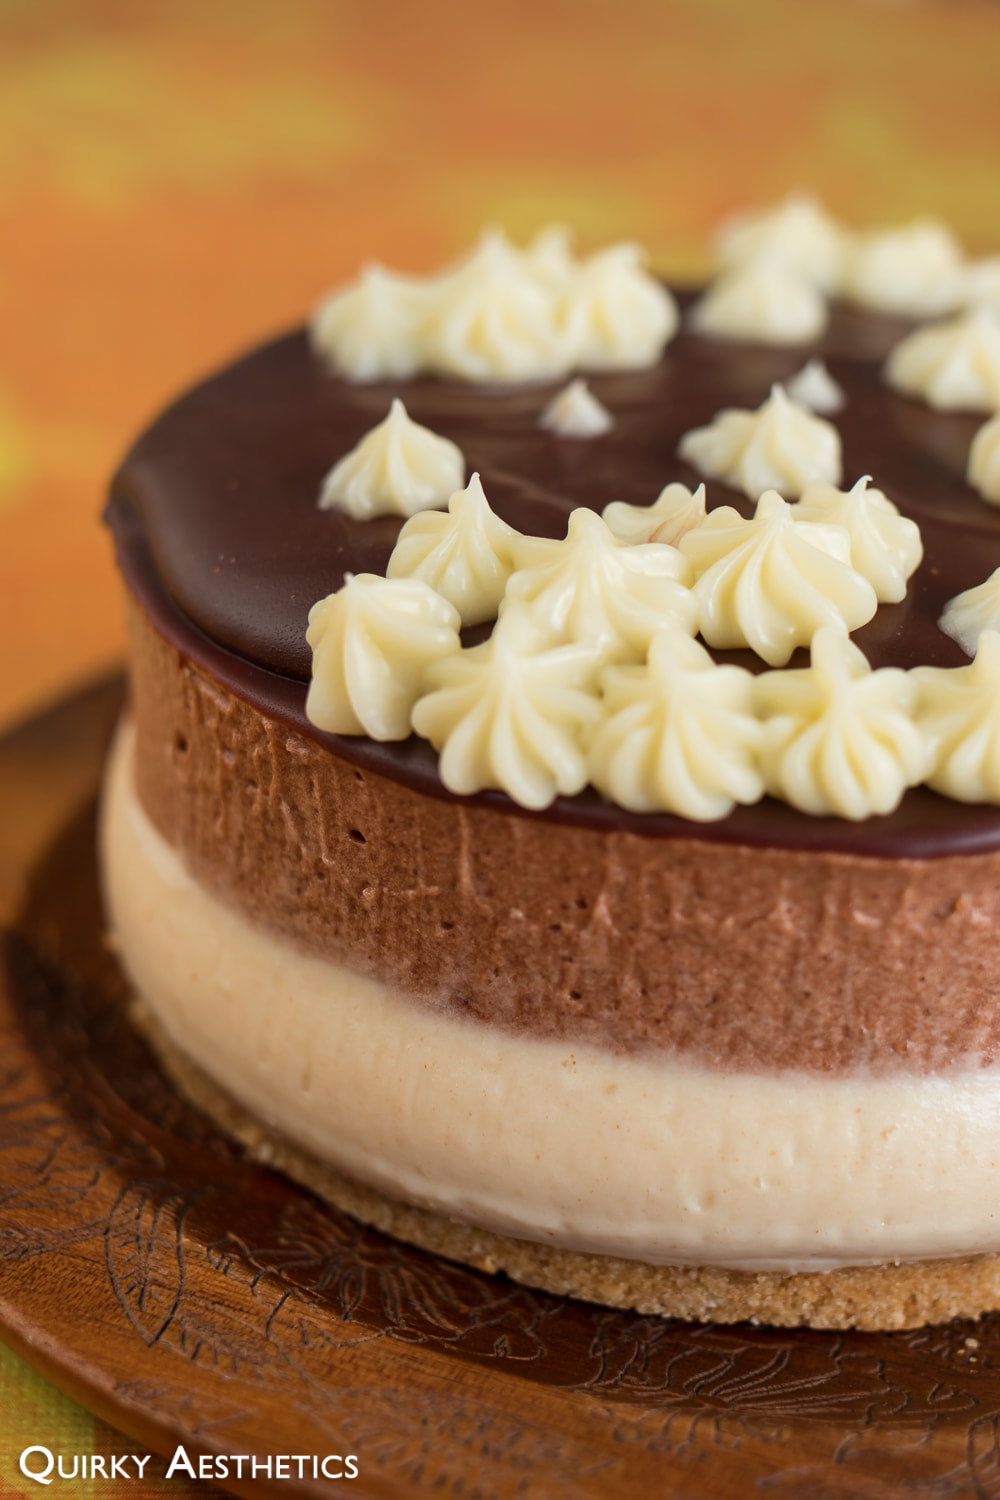
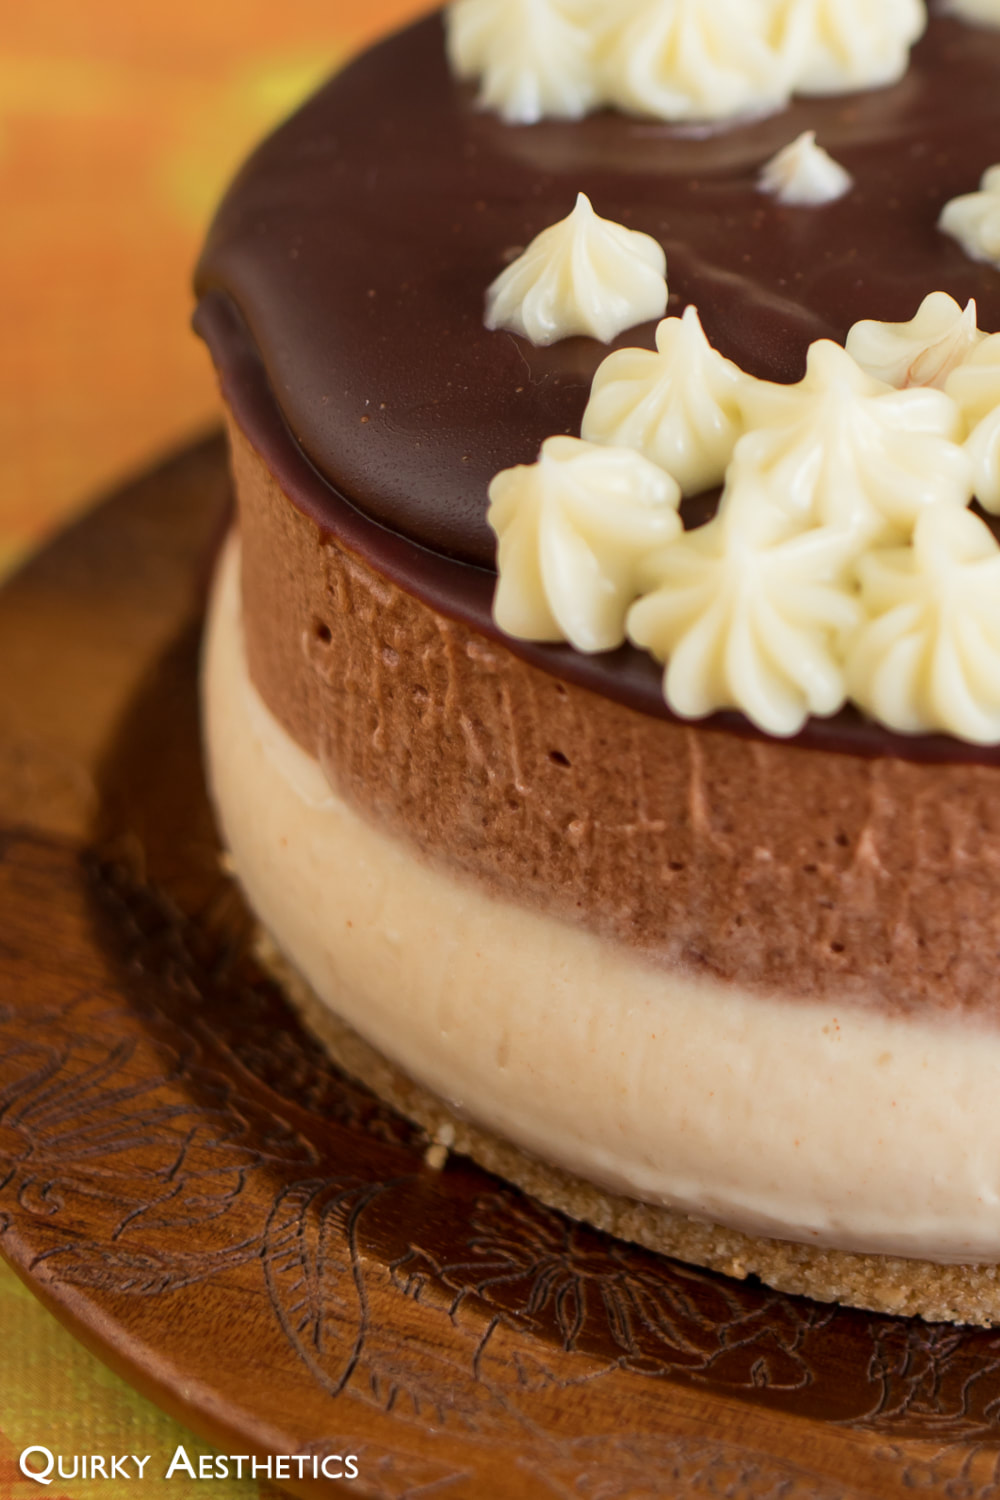
| Chocolate PB Mousse Cheesecake |


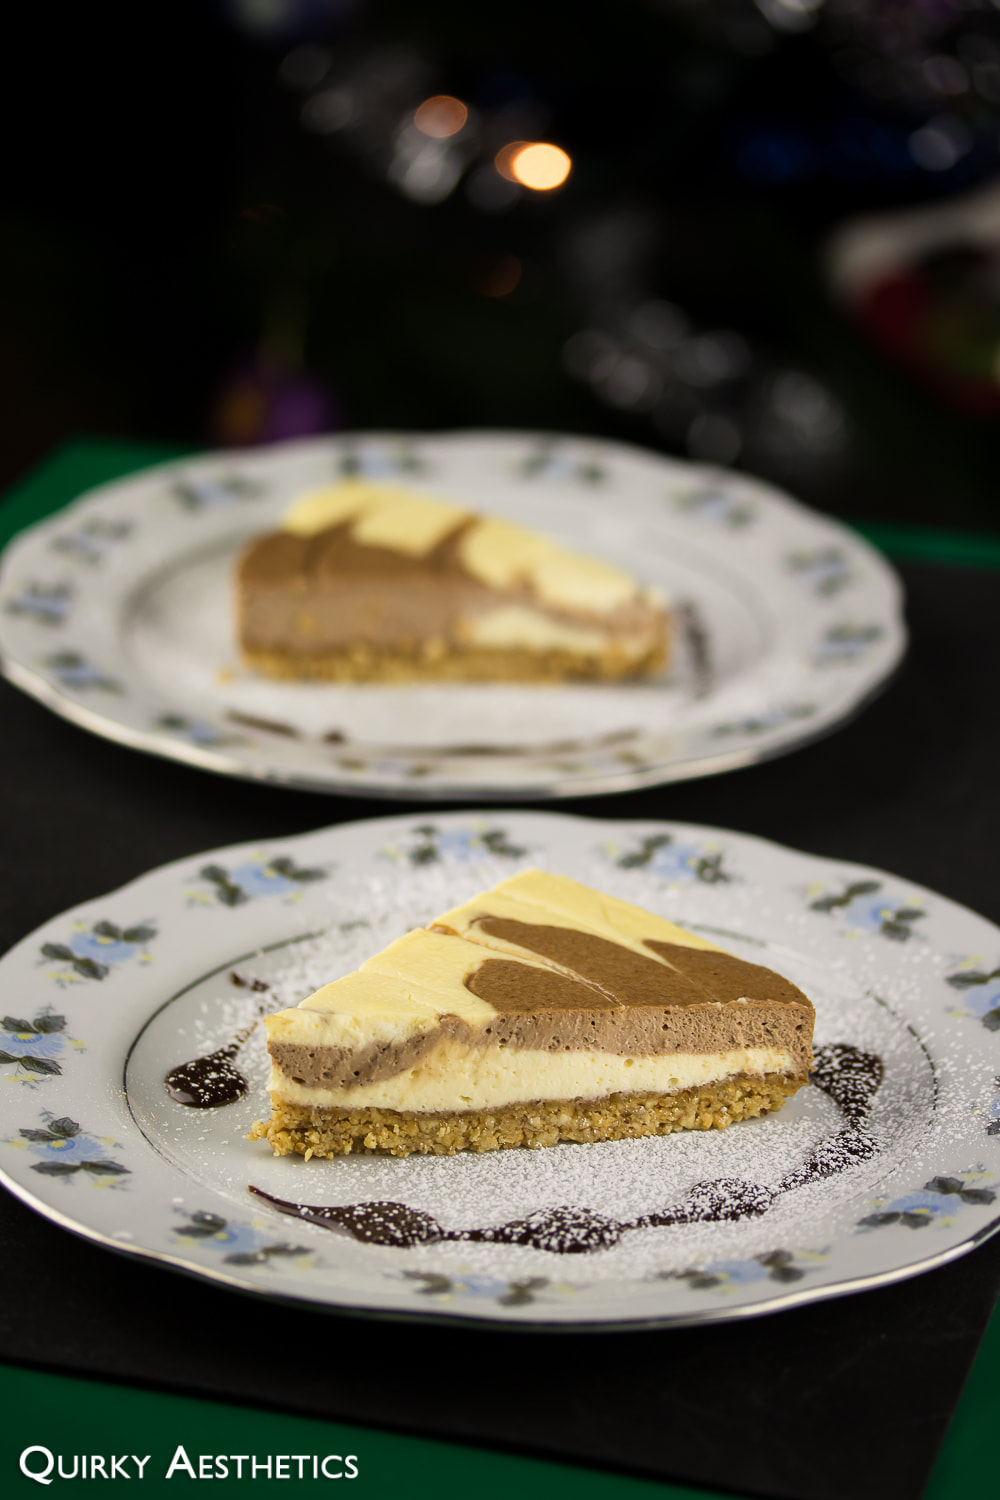
Other sources were referenced instead (gasp!) and scaled appropriately using basic arithmetic. A total of two cakes were crafted for the occasion - that is, the imminent date of birth of a fellow July baby.
In retrospect, placing the heaviest layer on top wasn't my wisest decision. It was as if I hadn't learned from having to retrofit Jinyoung's concert headband with added support measures.
In retrospect, placing the heaviest layer on top wasn't my wisest decision. It was as if I hadn't learned from having to retrofit Jinyoung's concert headband with added support measures.
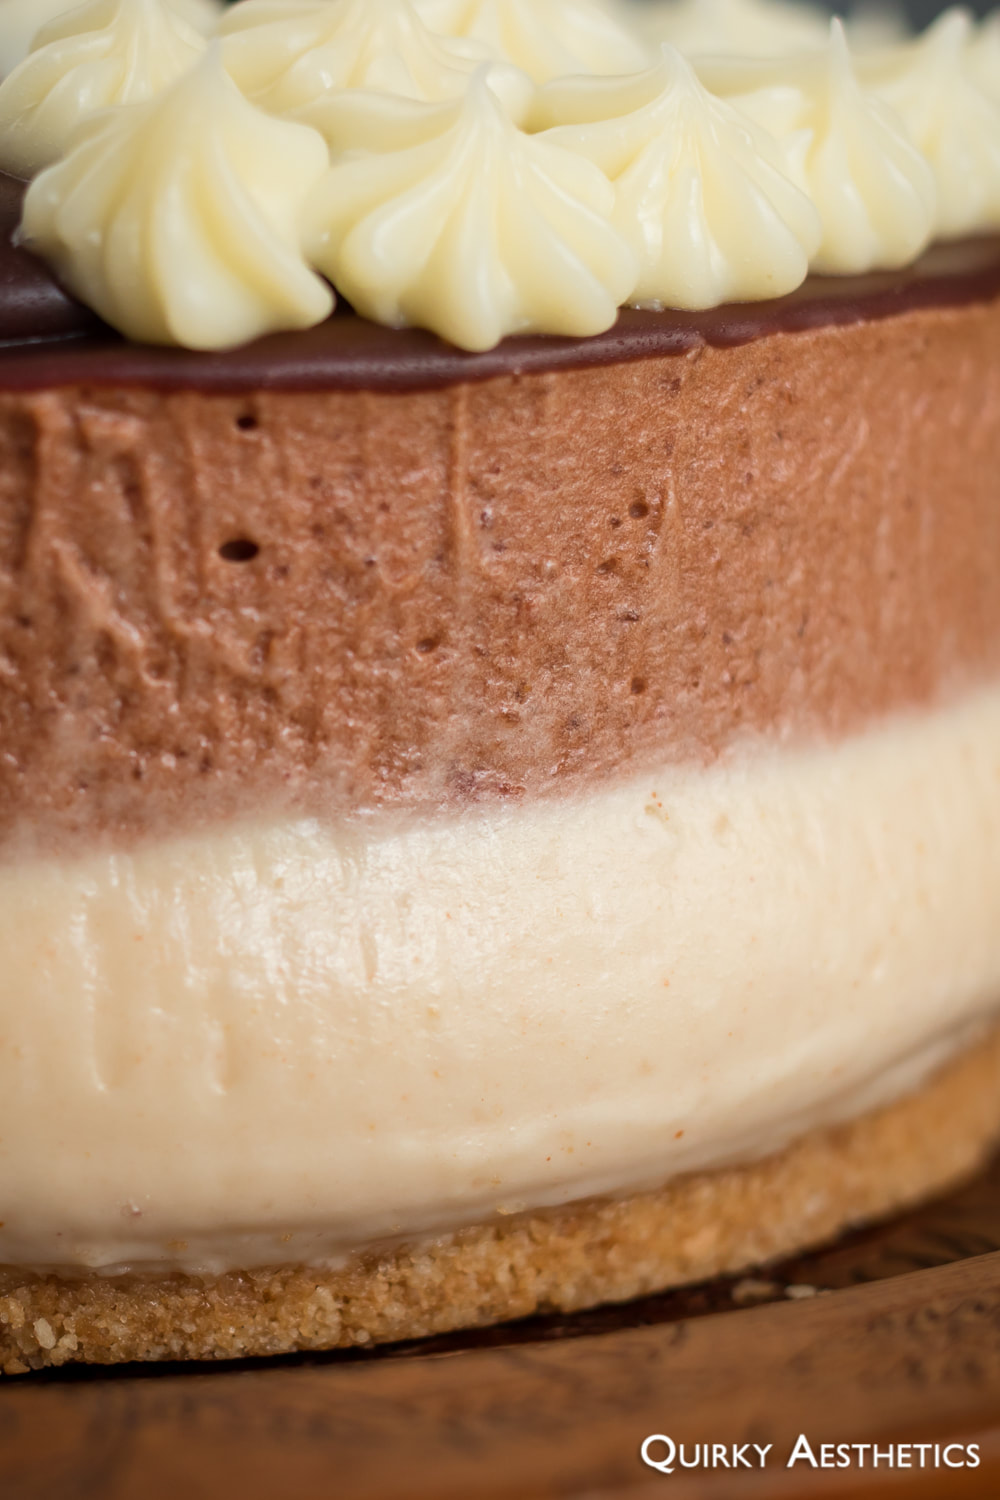
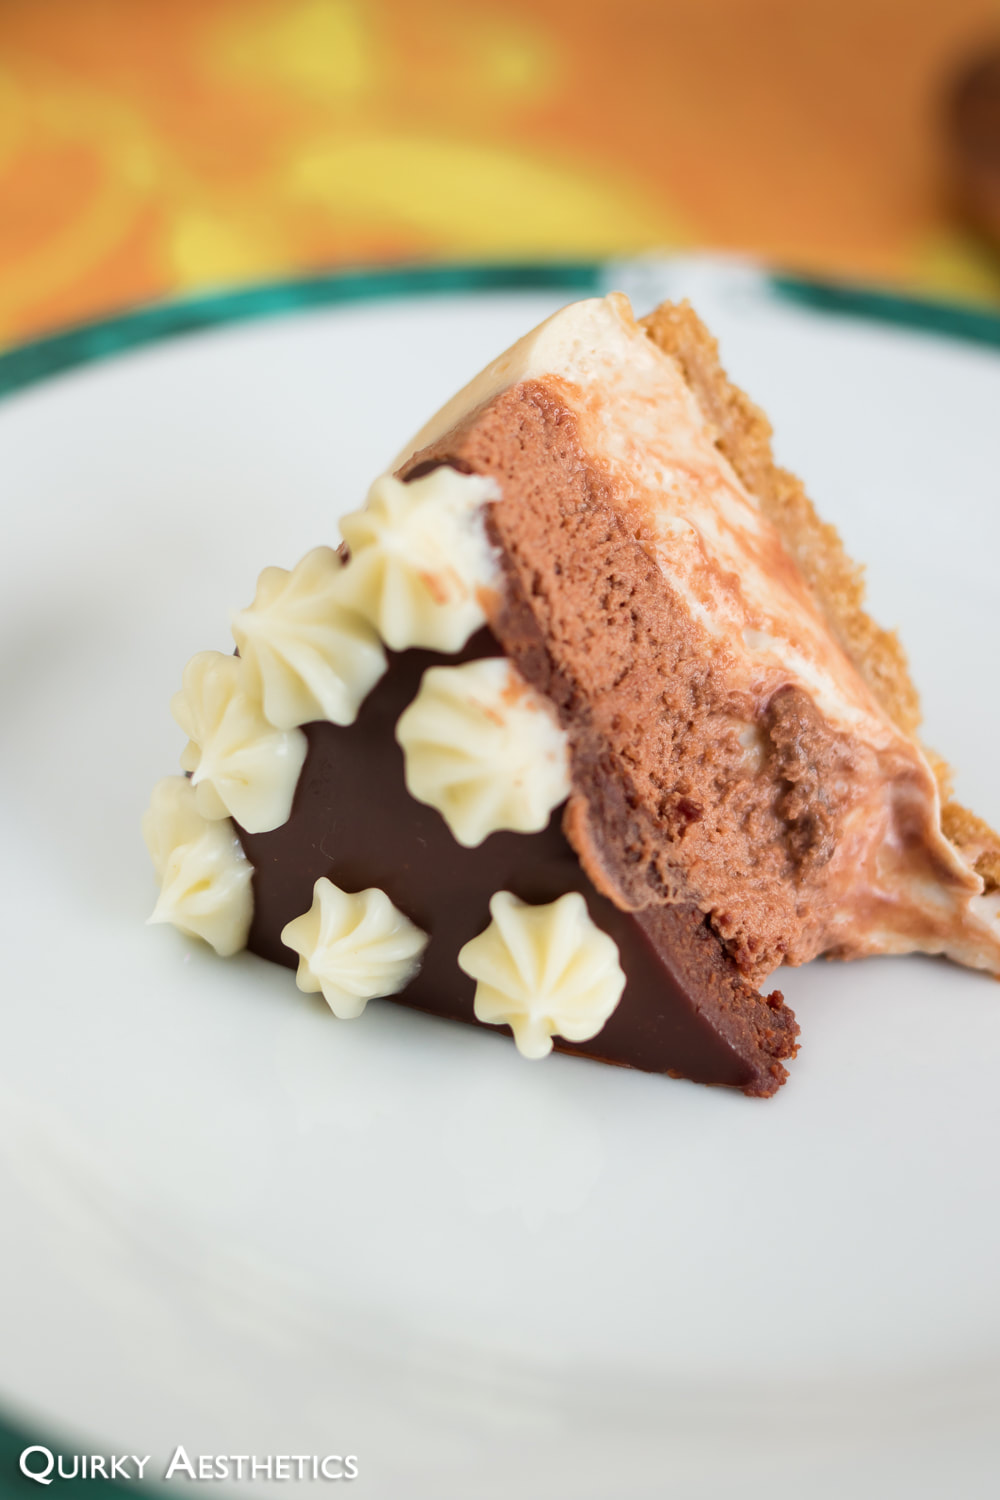
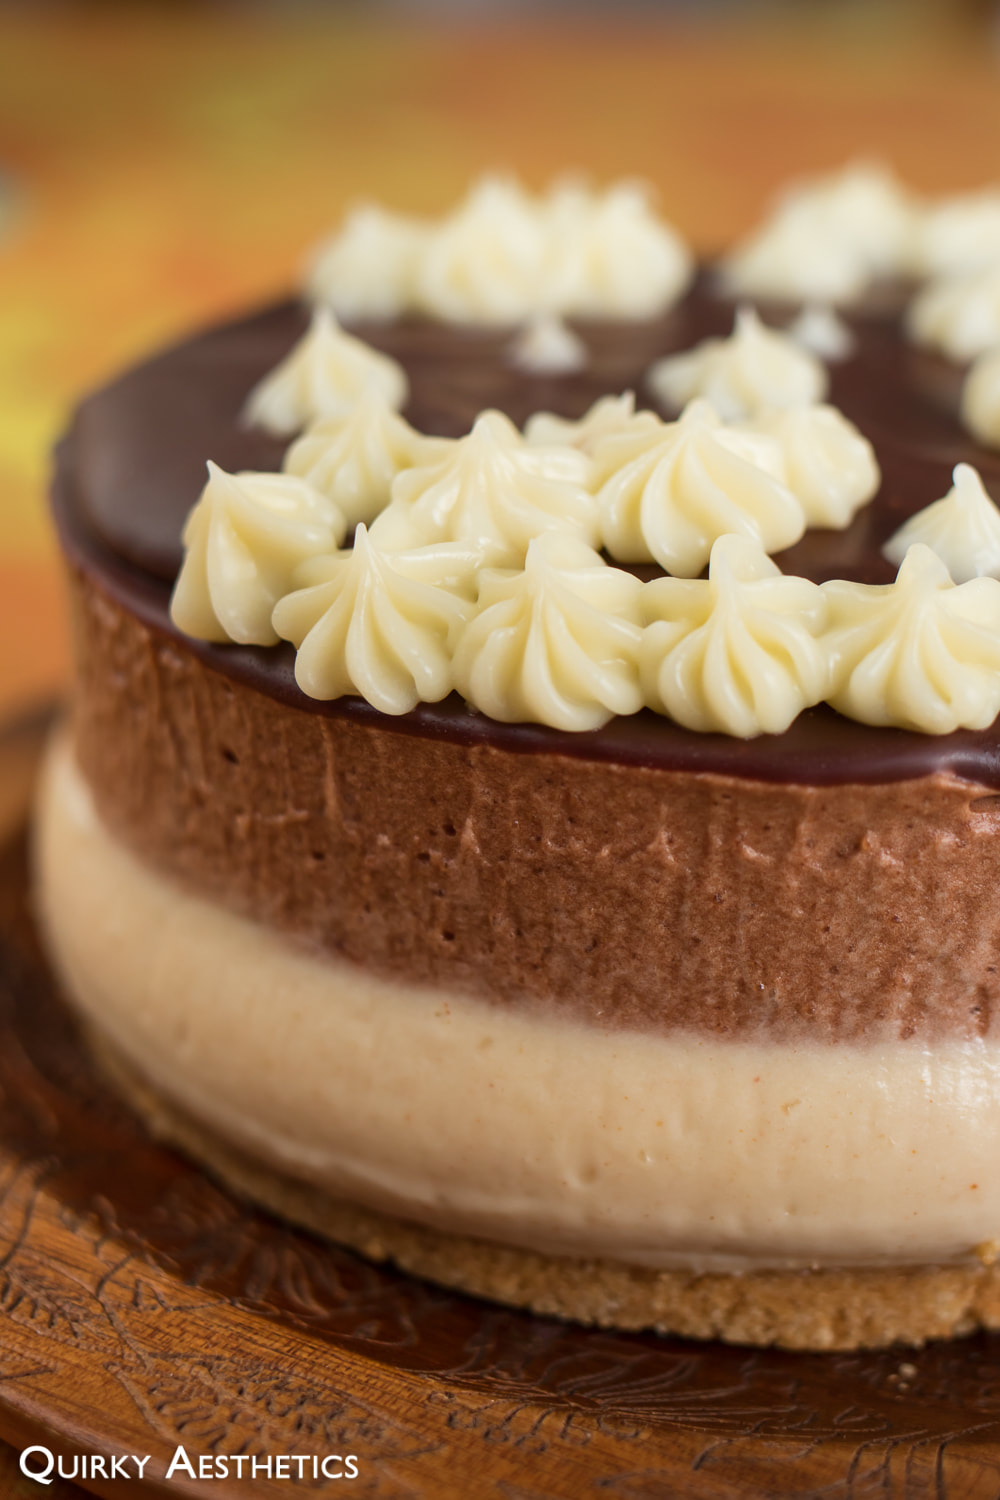
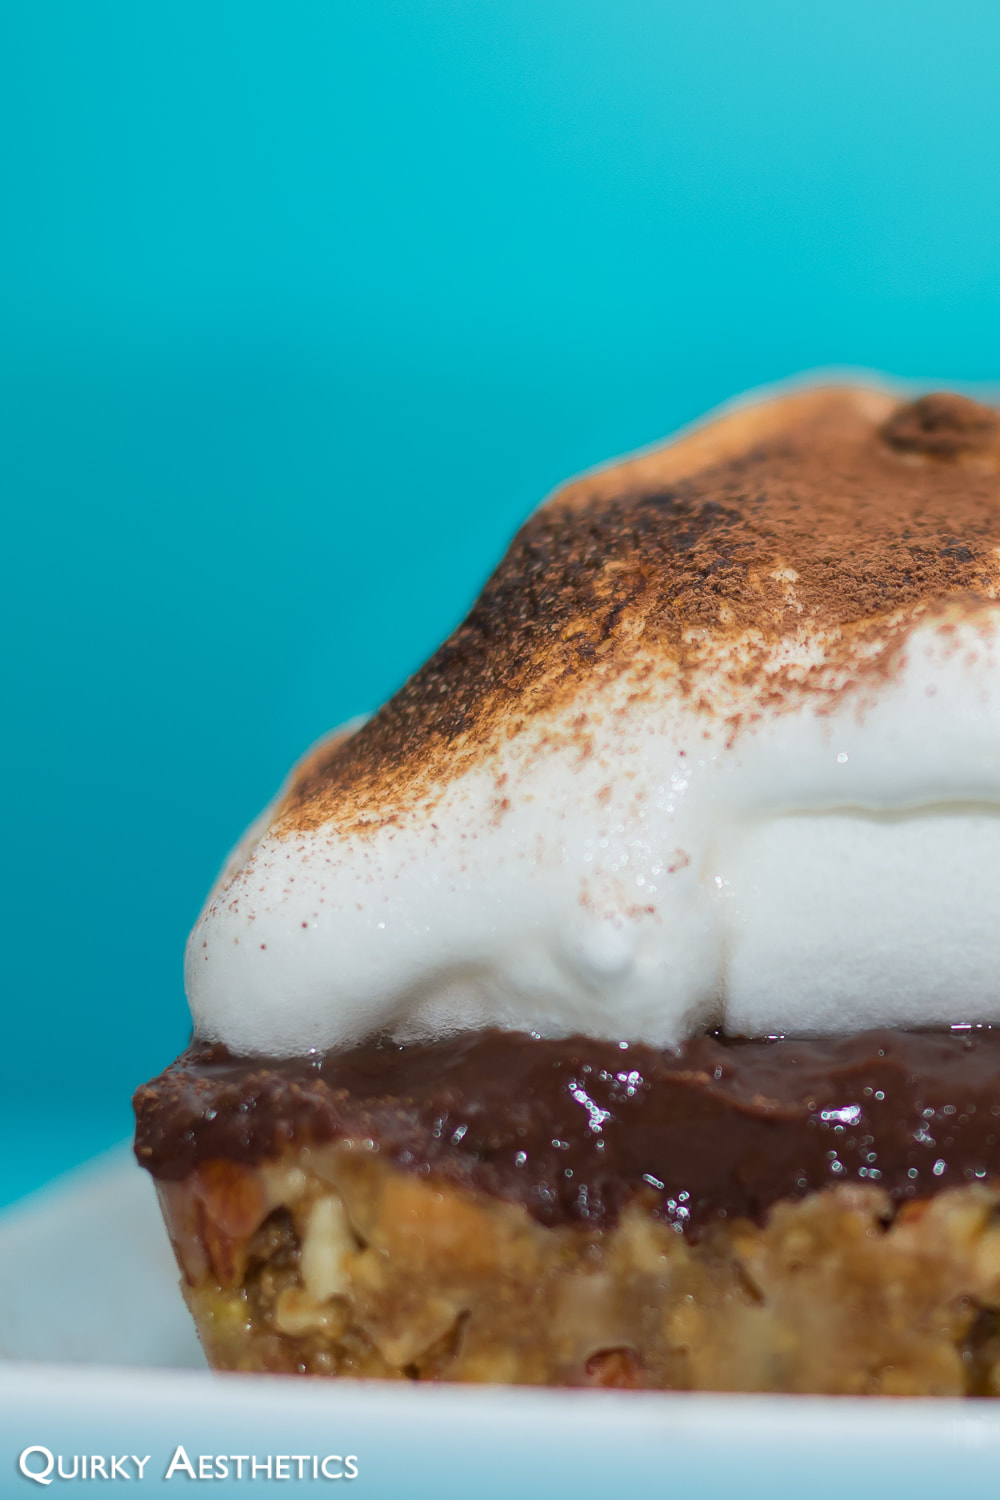
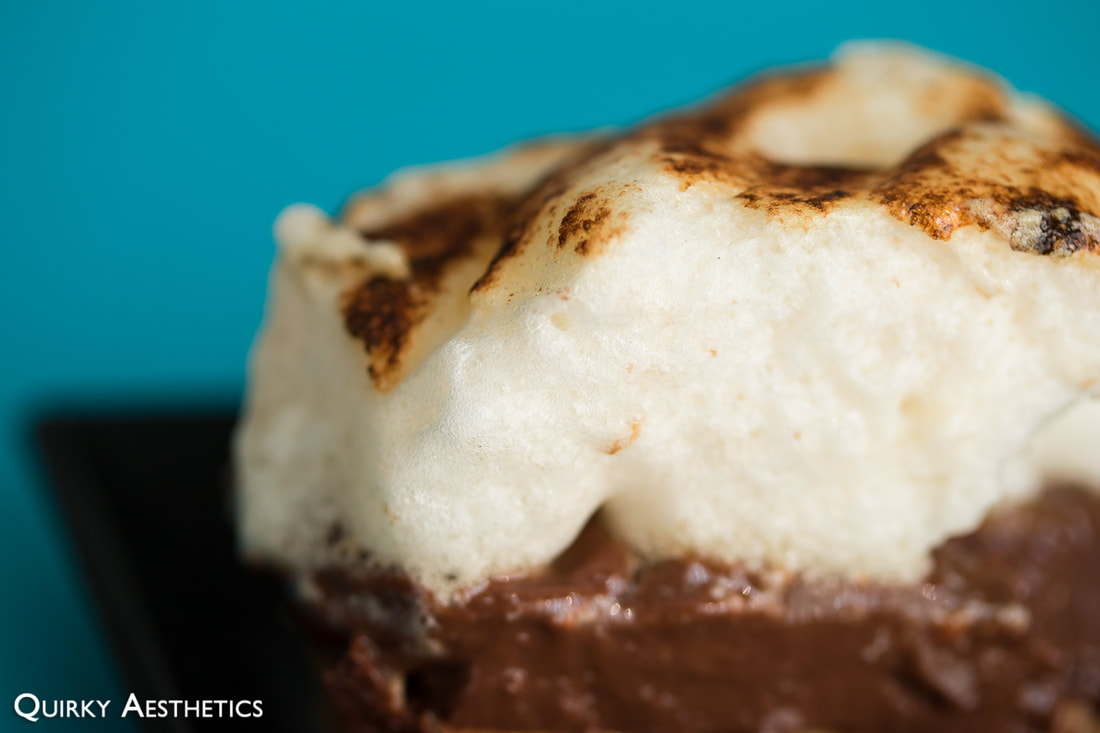
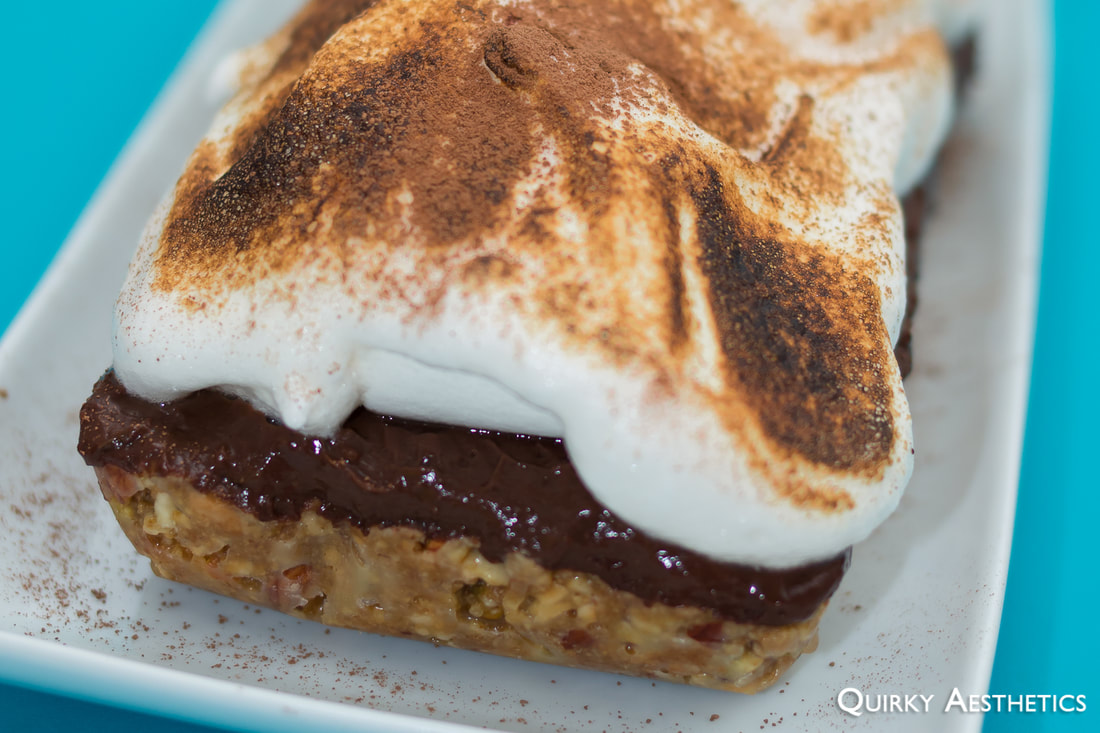
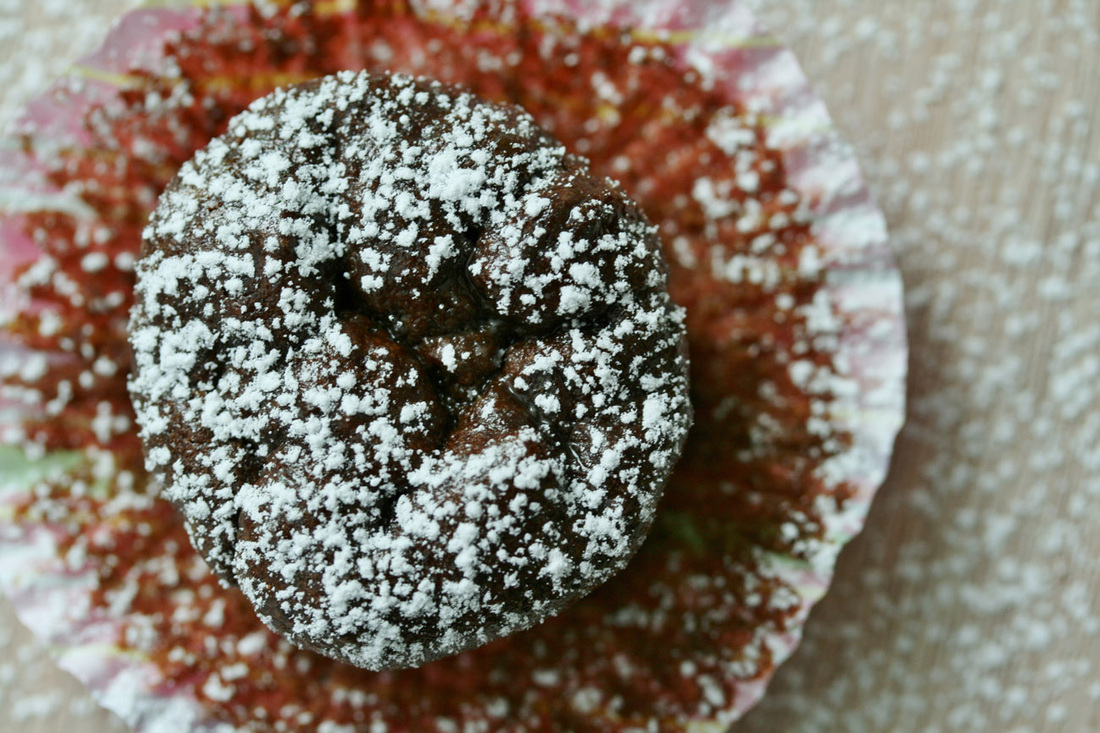
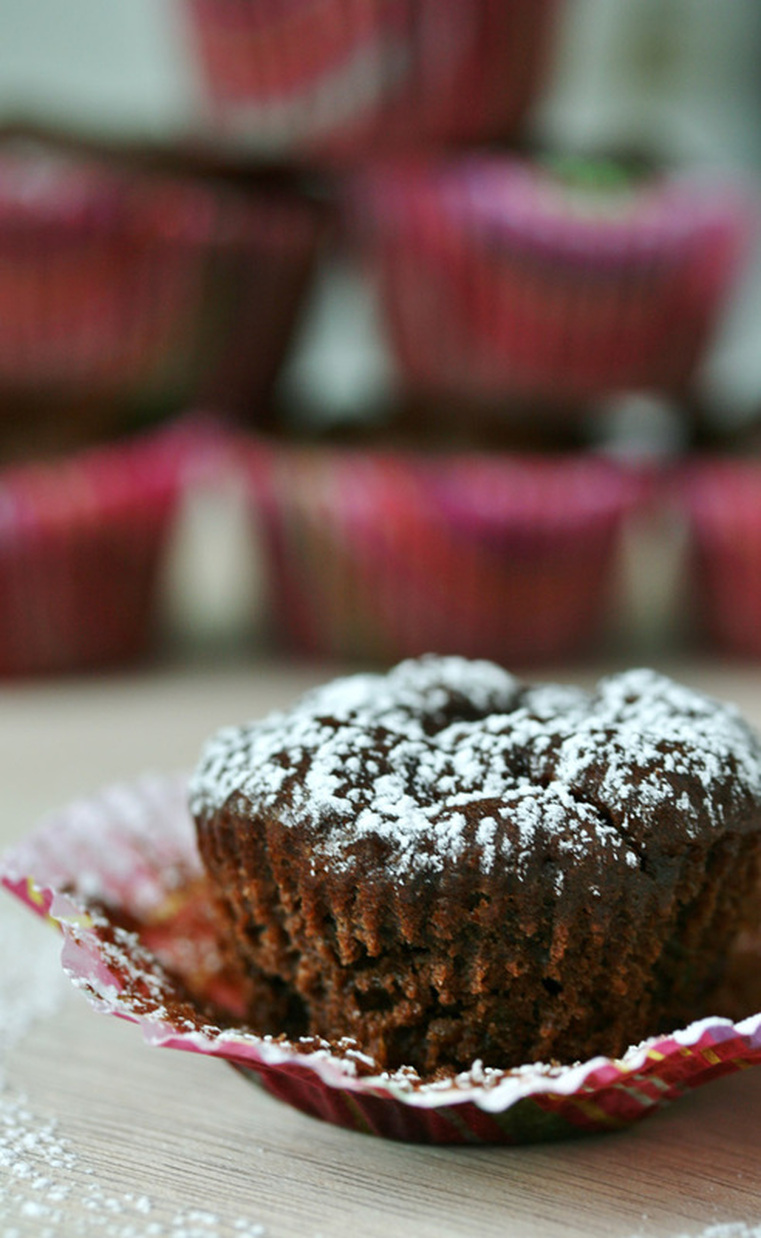
Despite the viscous chocolate ganache, slightly oozing mousse and cheesecake layers, and lack of icing sugar for the decorative embellishments, the overall product resisted collapse and was ultimately deemed delicious by its recipient. With mild notes of peanut butter, gentle tanginess from the cream cheese, and a obnoxiously velvety chocolate ganache, the specimen vanished in just under twenty-four hours following disclosure.
I suppose pastries aren't that annoying after all.
I suppose pastries aren't that annoying after all.
Ingredients
i) Graham Cracker Crust (Recipe adapted from Sally's Baking Addiction)
- 56g digestive cookies (or graham crackers)
- 19g brown sugar
- 32g unsalted butter, melted
ii) Peanut Butter Cheesecake (Recipe adapted from Sally's Baking Addiction)
- 84 ml whipping cream
- 190 g cream cheese, softened
- 32g granulated sugar *
- 44g plain yogurt *
- 1 tsp lemon juice
- 1 heaped tbsp smooth peanut butter *
iii) Chocolate Mousse (Recipe adapted from Richardo Cuisine)
- 56g dark chocolate couverture
-140 ml whipping cream
- 29g granulated sugar
- 2g gelatin
iv) Chocolate Ganache (Recipe adapted from Cooking Tree)
- 65g dark chocolate couverture
- 44ml whipping cream
- 33g unsalted butter
Directions:
i) Graham Cracker Crust
1) Grease ring molds and place atop a baking sheet lined with plastic wrap and/or parchment paper. Parchment paper is sturdier and ensures easier transfer, however is not entirely necessary.
2) In a food processor, blend digestive cookies and brown sugar until fine. Add in melted butter and pulse to mix well.
3) Divide the crumbs between the ring molds and compact well, ensuring that there are no gaps along the circumference.
4) Allow to chill in the refrigerator while preparing the cheesecake layer.
ii) Peanut Butter Cheesecake
1) Whisk together cream cheese and sugar until fluffy. The bowl should be free of any gritty sugar sounds before advancing.
2) Add in yogurt, lemon juice, and peanut butter. Mix well. (Vanilla extract was omitted in this formula, but feel free to add it in, along with any other extracts of choice, according to preference.)
3) Beat whipping cream to soft peaks and fold into the cream cheese mixture.
4) Remove crust from fridge and distribute cheesecake mixture evenly. Smooth out the surface and replace into the refrigerator for at least 3 hours.
iii) Chocolate Mousse
1) Place chocolate couverture over a bain-marie. Turn off the heat when partially melted and allow to continue melting over residual heat.
2) Beat whipping cream until soft peaks, adding in the granulated sugar in two parts.
3) Rapidly mix gelatin into melted chocolate. Stir vigorously to eliminate lumps and pockets of gelatin powder.
4) Mix one spoonful of the whipped cream into the melted chocolate, stirring until completely incorporated. Add this mixture back into the remainder of the whipped cream. Fold to combine.
5) Remove cheesecake from fridge and pour chocolate mousse mixture on top. Smooth out the surface and replace into the refrigerator for at least 3 hours.
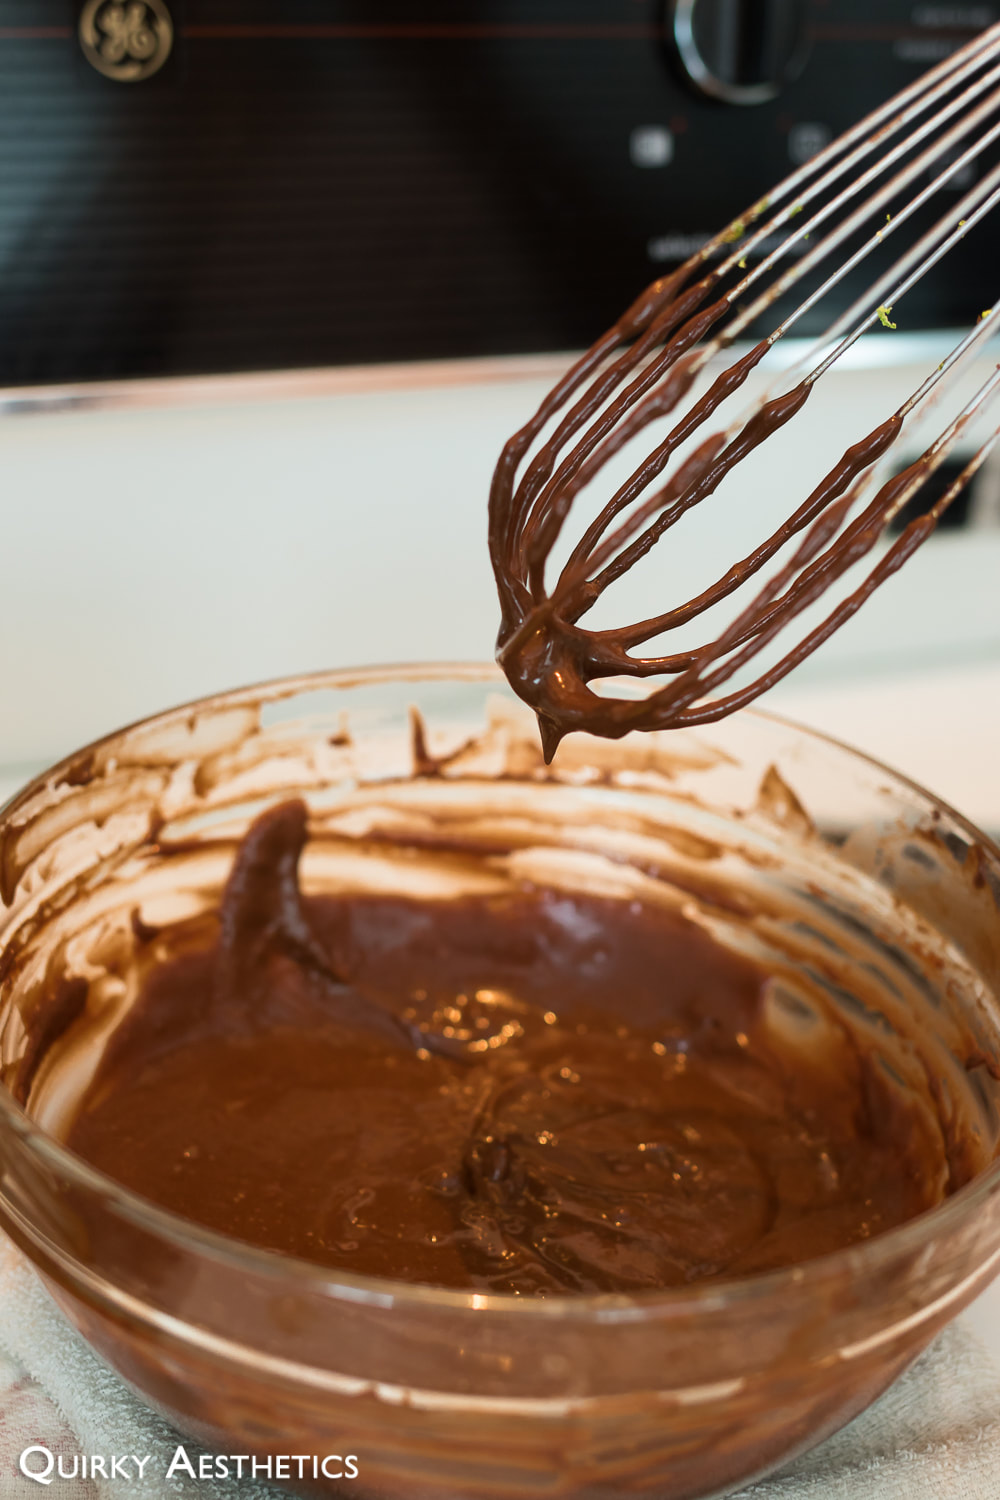
iv) Chocolate Ganache
1) Prior to making the Chocolate Ganache, ensure that the mousse cheesecakes have been unmolded. Holding a hot towel outside the ring mold for 10-15 seconds assists with this process. Line a baking sheet with plastic wrap and place a wire rack on top. Transfer the cakes to the wire rack. Place the cakes back into the fridge as the ganache is being assembled.
2) Place chocolate couverture and whipping cream over a bain-marie, allowing for gradual incorporation.
3) To prevent burning the chocolate, remove from heat when almost fully melted. Stir to melt in residual heat, smoothing out any lumps that remain.
4) Add in unsalted butter. Mix again to incorporate fully.
iv) Assembly
1) Remove the cakes from the fridge. Working quickly, pour the ganache over the cakes one at a time. If desired, allow the ganache to trickle down the sides for a slight "drip effect", otherwise consolidate in the centre for additional chocolate height.
2) Transfer to a cake board or serving plate after pouring and clean the bottom with a flat spatula.
3) Repeat with the other cake, then replace both back into the refrigerator for at least two hours. Adorn with cream cheese frosting if desired.
4) When ready to slice, dip a non-serrated knife into hot water and dry it off quickly. Cut straight down without using rocking motions to ensure a clean cross section.
5) Serve and enjoy!
Notes
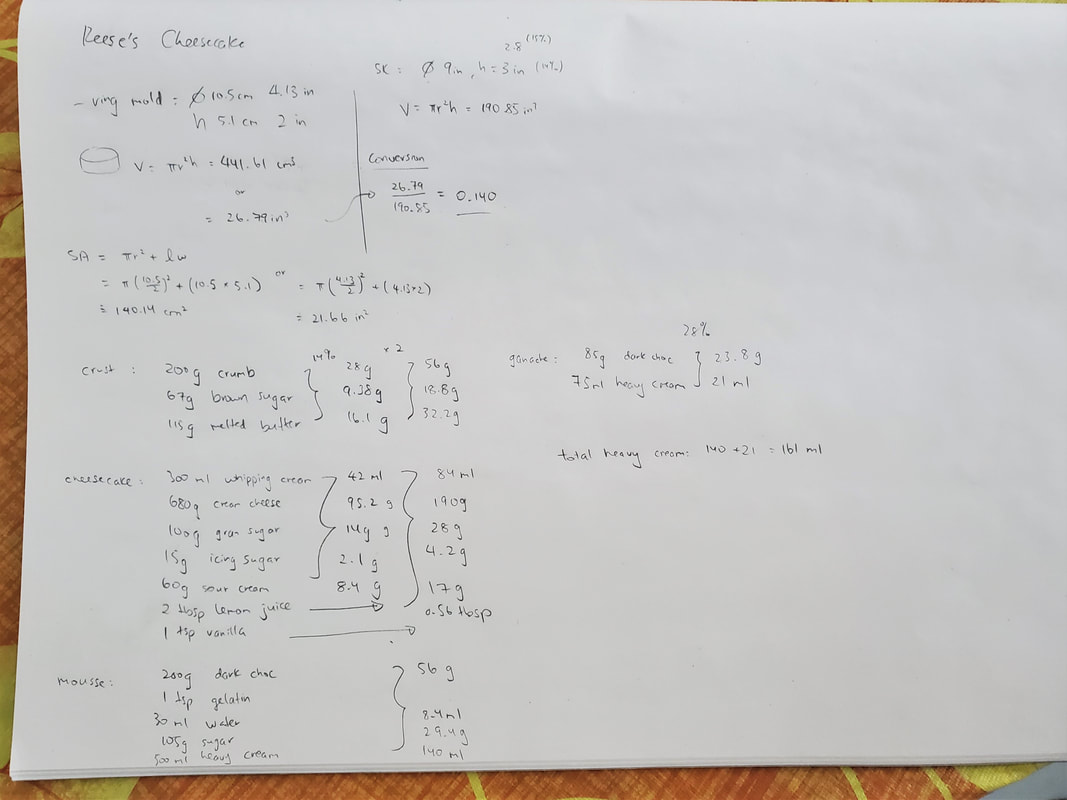
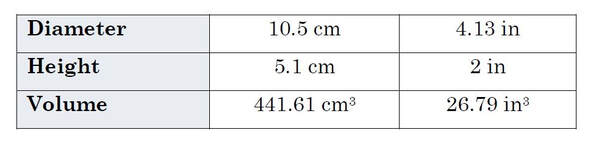
- Two aluminium ring molds were utilized in this recipe; dimensions can be found in the attached document. Volumetric calculations were conducted and scaled appropriately for the recipe used. For reference: Sally's Baking Addiction employed 9-inch molds with an approximate 2.8 - 3 inch height for a volume of 190.85 in3. The recipes were scaled using a 14% ratio, then multiplied by two for each of the ring molds.
i) Graham Cracker Crust (Recipe adapted from Sally's Baking Addiction)
- 56g digestive cookies (or graham crackers)
- 19g brown sugar
- 32g unsalted butter, melted
ii) Peanut Butter Cheesecake (Recipe adapted from Sally's Baking Addiction)
- 84 ml whipping cream
- 190 g cream cheese, softened
- 32g granulated sugar *
- 44g plain yogurt *
- 1 tsp lemon juice
- 1 heaped tbsp smooth peanut butter *
iii) Chocolate Mousse (Recipe adapted from Richardo Cuisine)
- 56g dark chocolate couverture
-140 ml whipping cream
- 29g granulated sugar
- 2g gelatin
iv) Chocolate Ganache (Recipe adapted from Cooking Tree)
- 65g dark chocolate couverture
- 44ml whipping cream
- 33g unsalted butter
Directions:
i) Graham Cracker Crust
1) Grease ring molds and place atop a baking sheet lined with plastic wrap and/or parchment paper. Parchment paper is sturdier and ensures easier transfer, however is not entirely necessary.
2) In a food processor, blend digestive cookies and brown sugar until fine. Add in melted butter and pulse to mix well.
3) Divide the crumbs between the ring molds and compact well, ensuring that there are no gaps along the circumference.
4) Allow to chill in the refrigerator while preparing the cheesecake layer.
ii) Peanut Butter Cheesecake
1) Whisk together cream cheese and sugar until fluffy. The bowl should be free of any gritty sugar sounds before advancing.
2) Add in yogurt, lemon juice, and peanut butter. Mix well. (Vanilla extract was omitted in this formula, but feel free to add it in, along with any other extracts of choice, according to preference.)
3) Beat whipping cream to soft peaks and fold into the cream cheese mixture.
4) Remove crust from fridge and distribute cheesecake mixture evenly. Smooth out the surface and replace into the refrigerator for at least 3 hours.
iii) Chocolate Mousse
1) Place chocolate couverture over a bain-marie. Turn off the heat when partially melted and allow to continue melting over residual heat.
2) Beat whipping cream until soft peaks, adding in the granulated sugar in two parts.
3) Rapidly mix gelatin into melted chocolate. Stir vigorously to eliminate lumps and pockets of gelatin powder.
4) Mix one spoonful of the whipped cream into the melted chocolate, stirring until completely incorporated. Add this mixture back into the remainder of the whipped cream. Fold to combine.
5) Remove cheesecake from fridge and pour chocolate mousse mixture on top. Smooth out the surface and replace into the refrigerator for at least 3 hours.
iv) Chocolate Ganache
1) Prior to making the Chocolate Ganache, ensure that the mousse cheesecakes have been unmolded. Holding a hot towel outside the ring mold for 10-15 seconds assists with this process. Line a baking sheet with plastic wrap and place a wire rack on top. Transfer the cakes to the wire rack. Place the cakes back into the fridge as the ganache is being assembled.
2) Place chocolate couverture and whipping cream over a bain-marie, allowing for gradual incorporation.
3) To prevent burning the chocolate, remove from heat when almost fully melted. Stir to melt in residual heat, smoothing out any lumps that remain.
4) Add in unsalted butter. Mix again to incorporate fully.
iv) Assembly
1) Remove the cakes from the fridge. Working quickly, pour the ganache over the cakes one at a time. If desired, allow the ganache to trickle down the sides for a slight "drip effect", otherwise consolidate in the centre for additional chocolate height.
2) Transfer to a cake board or serving plate after pouring and clean the bottom with a flat spatula.
3) Repeat with the other cake, then replace both back into the refrigerator for at least two hours. Adorn with cream cheese frosting if desired.
4) When ready to slice, dip a non-serrated knife into hot water and dry it off quickly. Cut straight down without using rocking motions to ensure a clean cross section.
5) Serve and enjoy!
Notes
- Two aluminium ring molds were utilized in this recipe; dimensions can be found in the attached document. Volumetric calculations were conducted and scaled appropriately for the recipe used. For reference: Sally's Baking Addiction employed 9-inch molds with an approximate 2.8 - 3 inch height for a volume of 190.85 in3. The recipes were scaled using a 14% ratio, then multiplied by two for each of the ring molds.
- For part i) Graham Cracker Crust, I utilized Maria cookies, however feel free to swap in the preferred choice of graham crackers or even chocolate wafer cookies.
- For part ii) Peanut Butter Cheesecake, granulated sugar replaced the mixture of granulated and confectioners' sugar as I did not have the latter on hand. Sour cream was substituted with an accidentally generous portion of plain yogurt; as such, it is recommended to add gelatin or cornstarch to stabilize the mixture, as the final result was slightly softer than anticipated. The addition of peanut butter contributed delicate nutty (no, duh) undernotes, where the amount included can be adjusted according to one's preference.
- For part iv) Chocolate Ganache, a ratio of 3:2:0.5 of chocolate to cream to butter was used. This yielded a thick ganache that was barely spreadable, so it is advised to use a 1:1 ratio for smoother, glossy finish.
- Adorning the final product with frosting is entirely optional. This addition was an impromptu decision that does not correspond to a specific recipe. Frosting components merely consisted of: cream cheese, unsalted butter, and granulated sugar. However, it should be noted that granulated sugar tends to darken the frosting and contribute moisture, making confectioners' sugar the more suitable alternative should this decorative step be undertaken.


 RSS Feed