Random Thoughts of a Quirky Blogger
  • ~ Home ~
  • ~ What I Think ~
  • ~ What I See ~
    • Events >
      • Food
    • People
    • Places >
      • Disclaimer
  • ~ What I Make ~
  • Blog Series
  • Terms and Conditions

Matcha & Cocoa Sugar Cookies: The Bear and the Bunny

3/20/2020

1 Comment

 
​For the longest time, it hadn't occurred to me that cookies were my go-to guilty pleasure. Made known to me by none other than the ever-observant orangecane, I began to unravel a world of baking possibilities within my kitchen, specifically in the realm of cookie testing.
Picture
Smitten Kitchen is highly commended by my fellow baker and tea-fanatic, with the acts of scaling and substituting strictly spurned. While I had halved the recipe in previous iterations), nevertheless maintaining a single unit of egg, and achieved beyond satisfactory results, I opted to reassess this recipe's egg-to-butter ratio with post-vacation quarantine time on my hands.
Picture
Picture
Picture
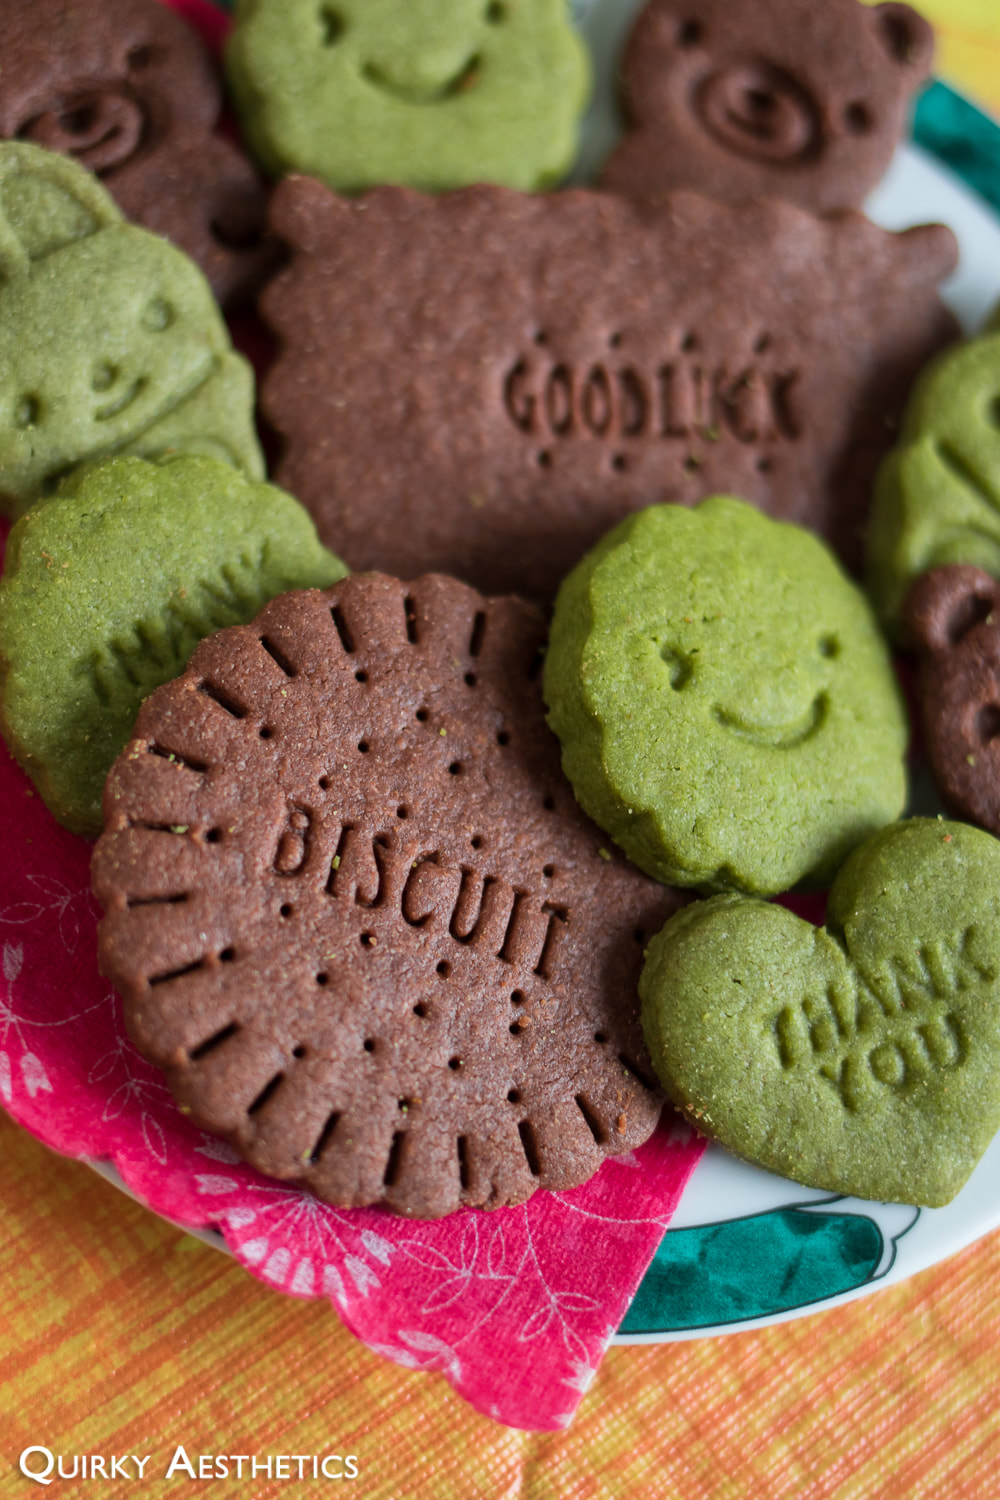
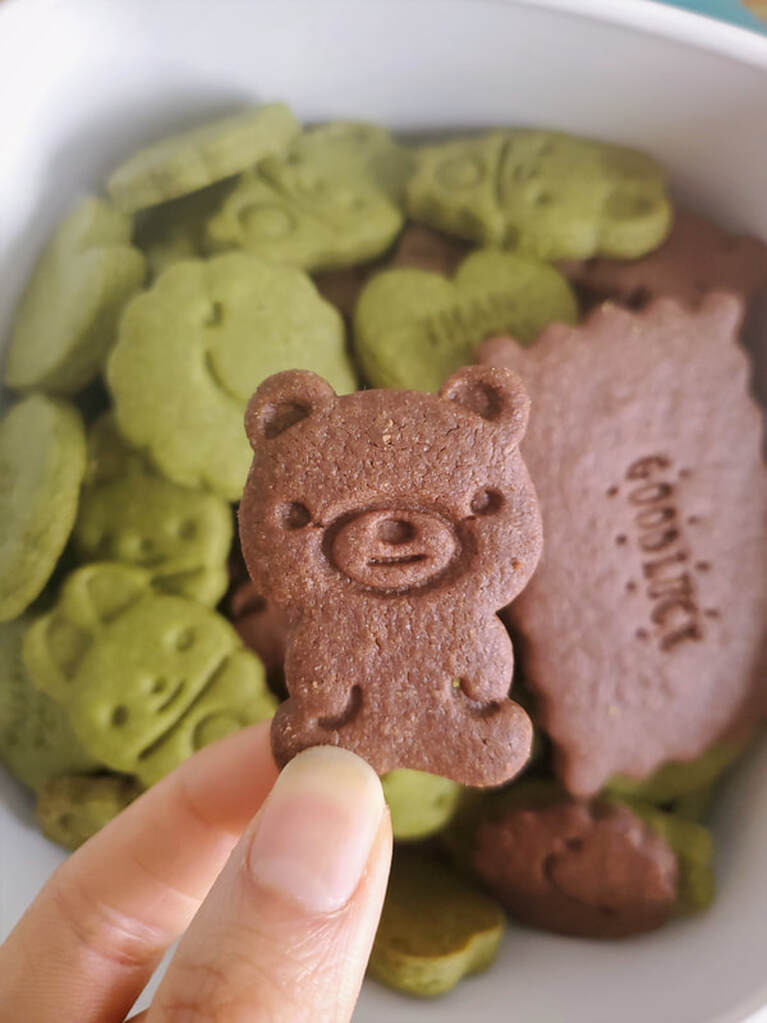
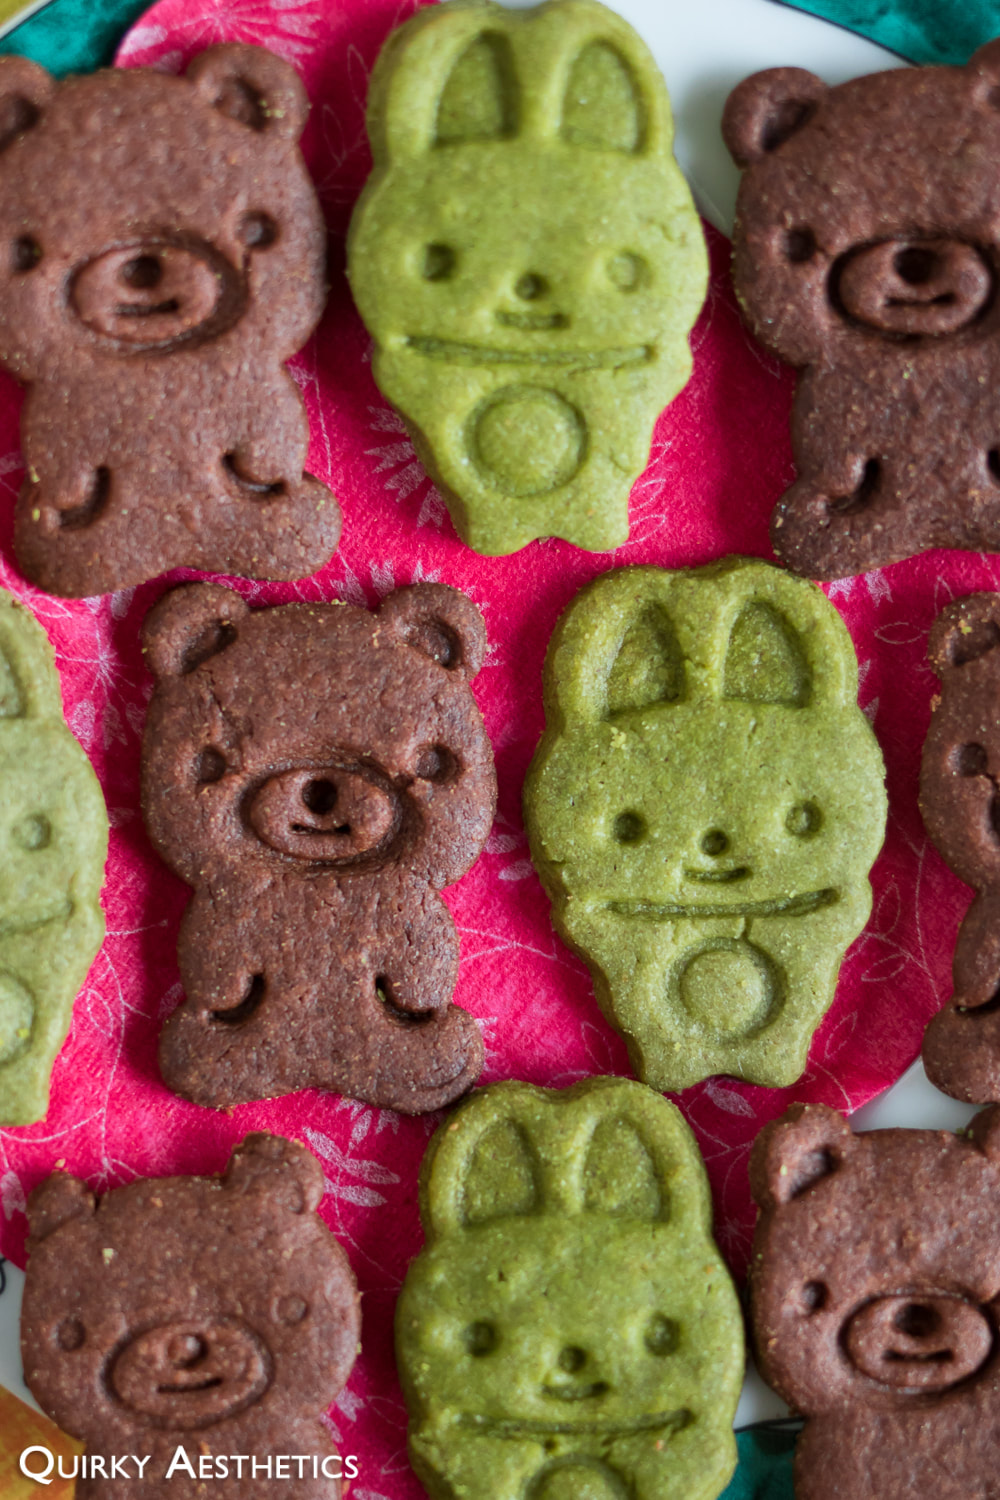
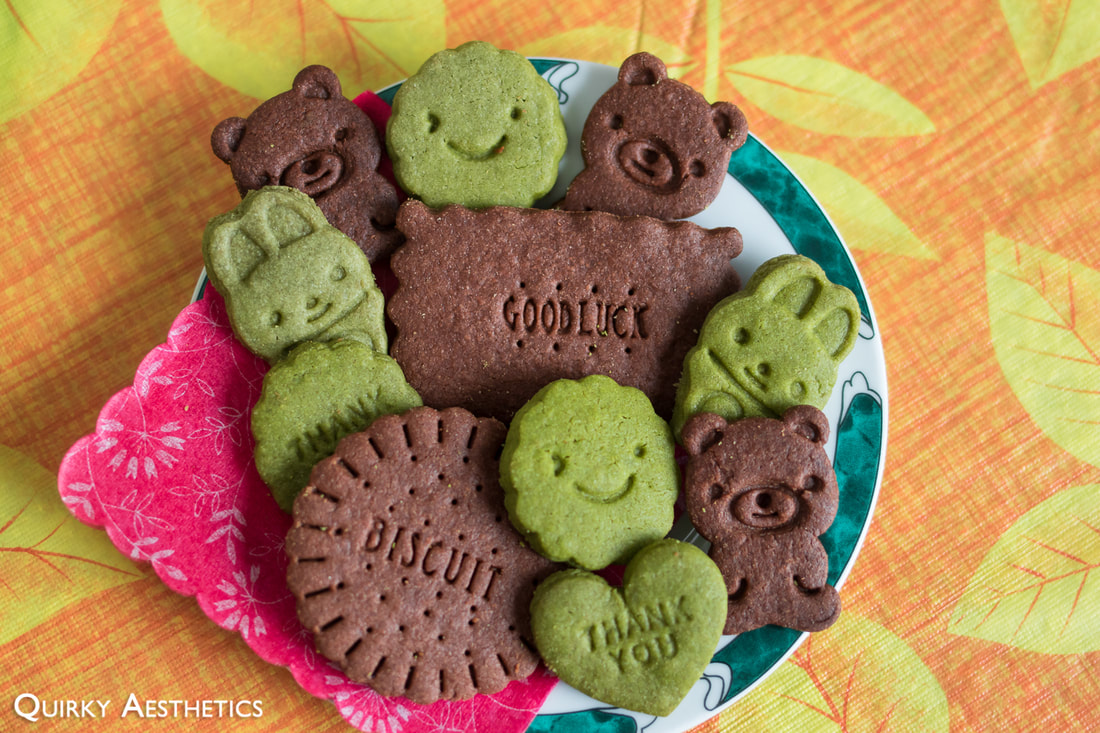
​Oomomo cookie cutters now in possession, I took to the three-hour ordeal of ingredient incorporation, refrigerating, rolling, cutting, stamping, and rolling and cutting again. The tips included in the original post could not be fully utilized in the face of character-shaped cookie cutters (with message stamps), so the traditional, non-time-saving methods were used.
Picture
Picture
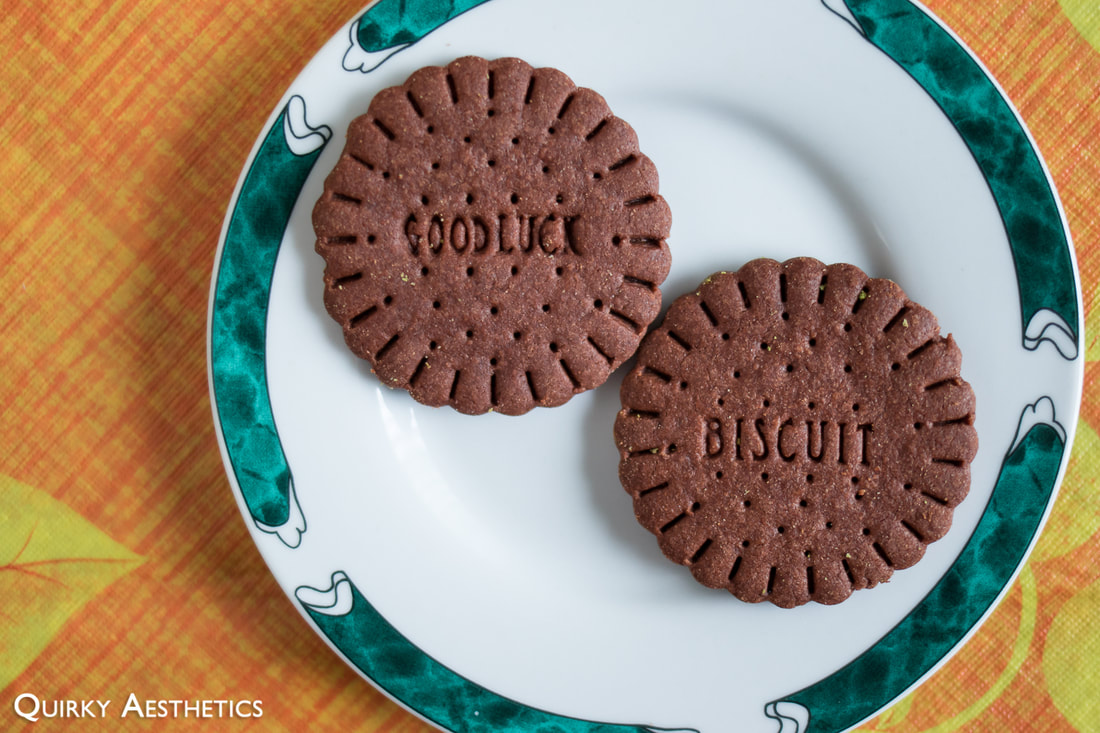
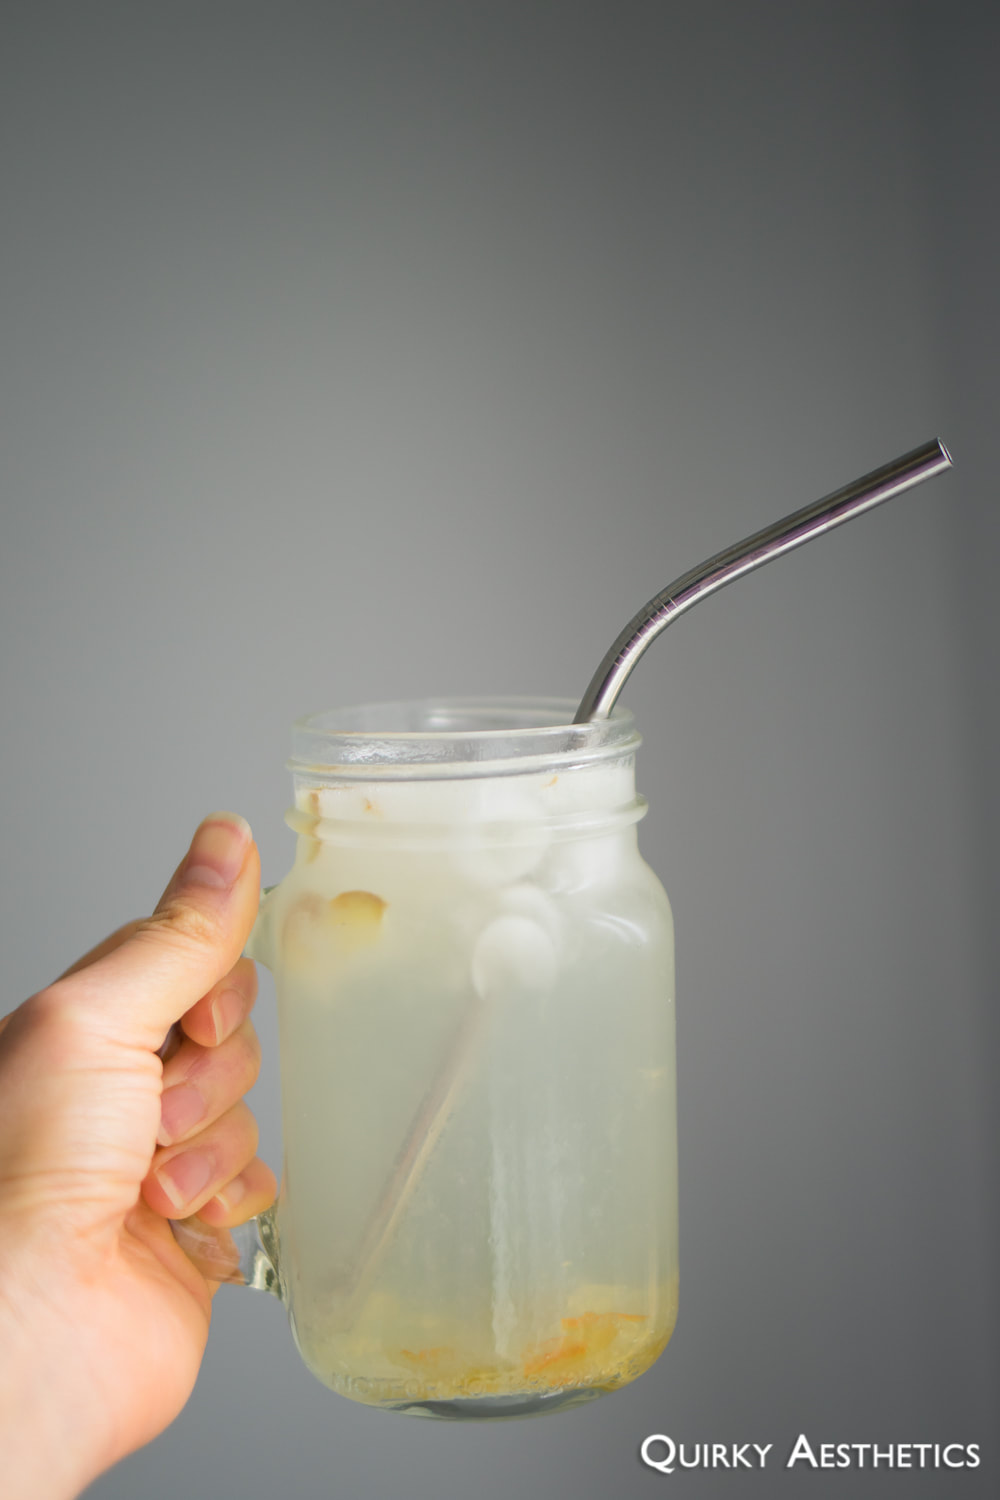
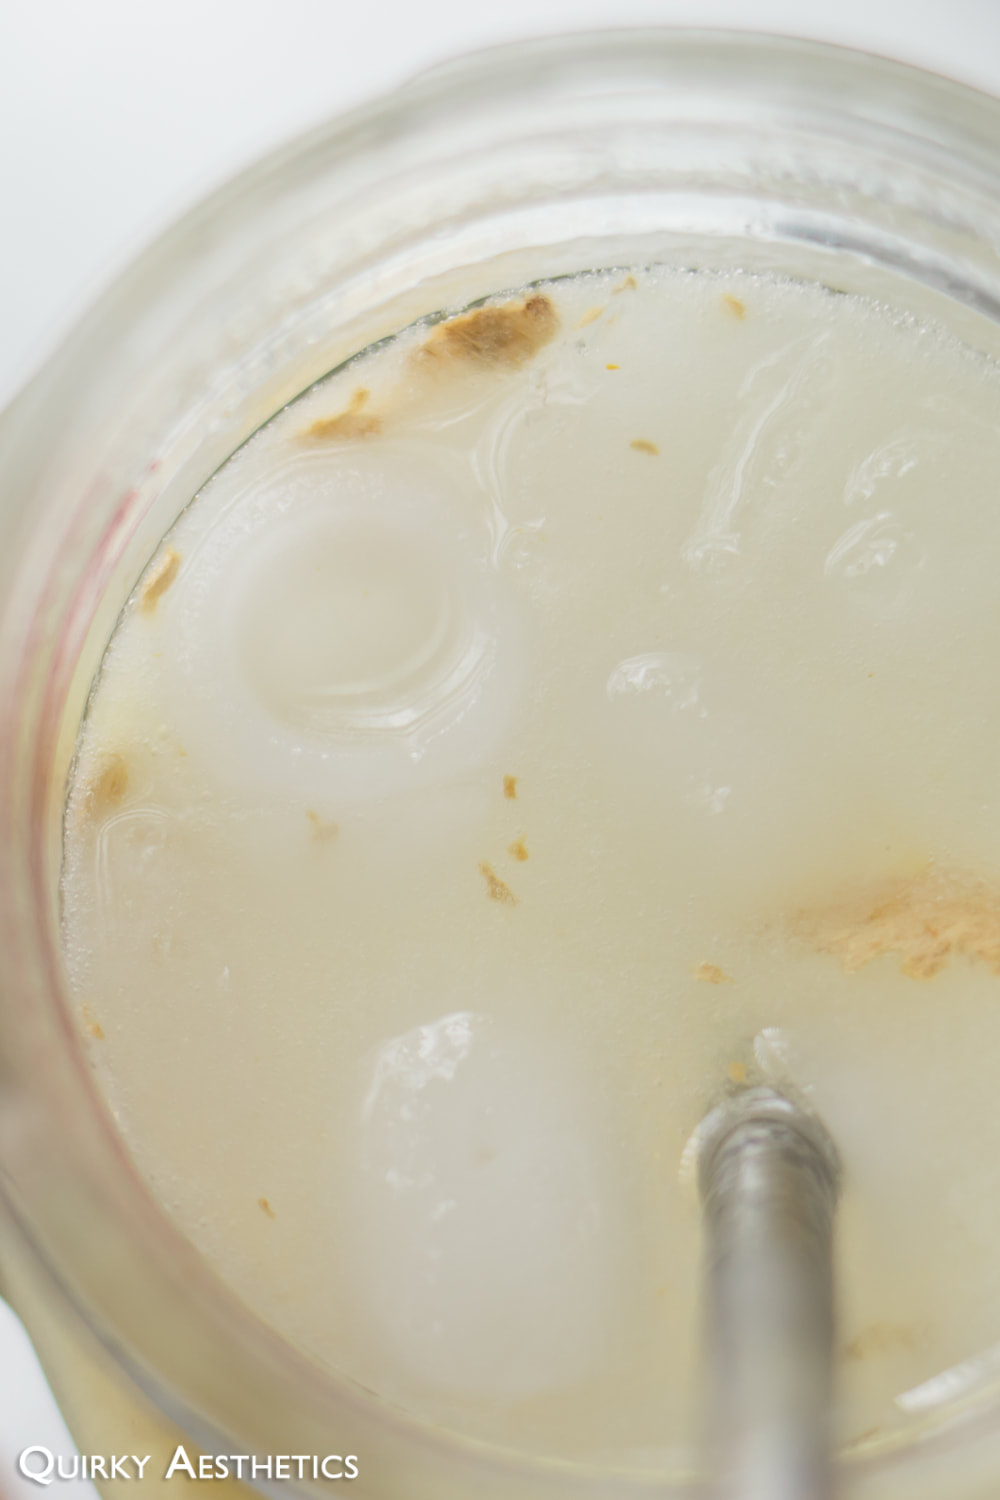
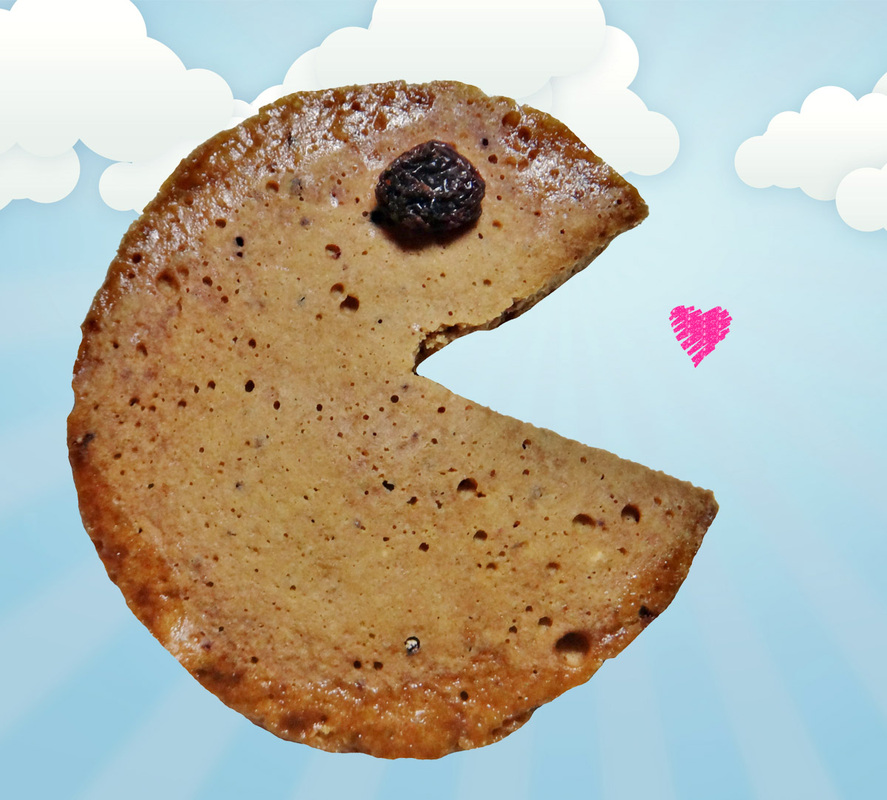
For maximum enjoyment, pair alongside a freshly-brewed cup of joe or refreshing homemade yuzu ginger ale!
Picture
Picture
Ingredients
(Recipe inspired by and adapted from smitten kitchen)

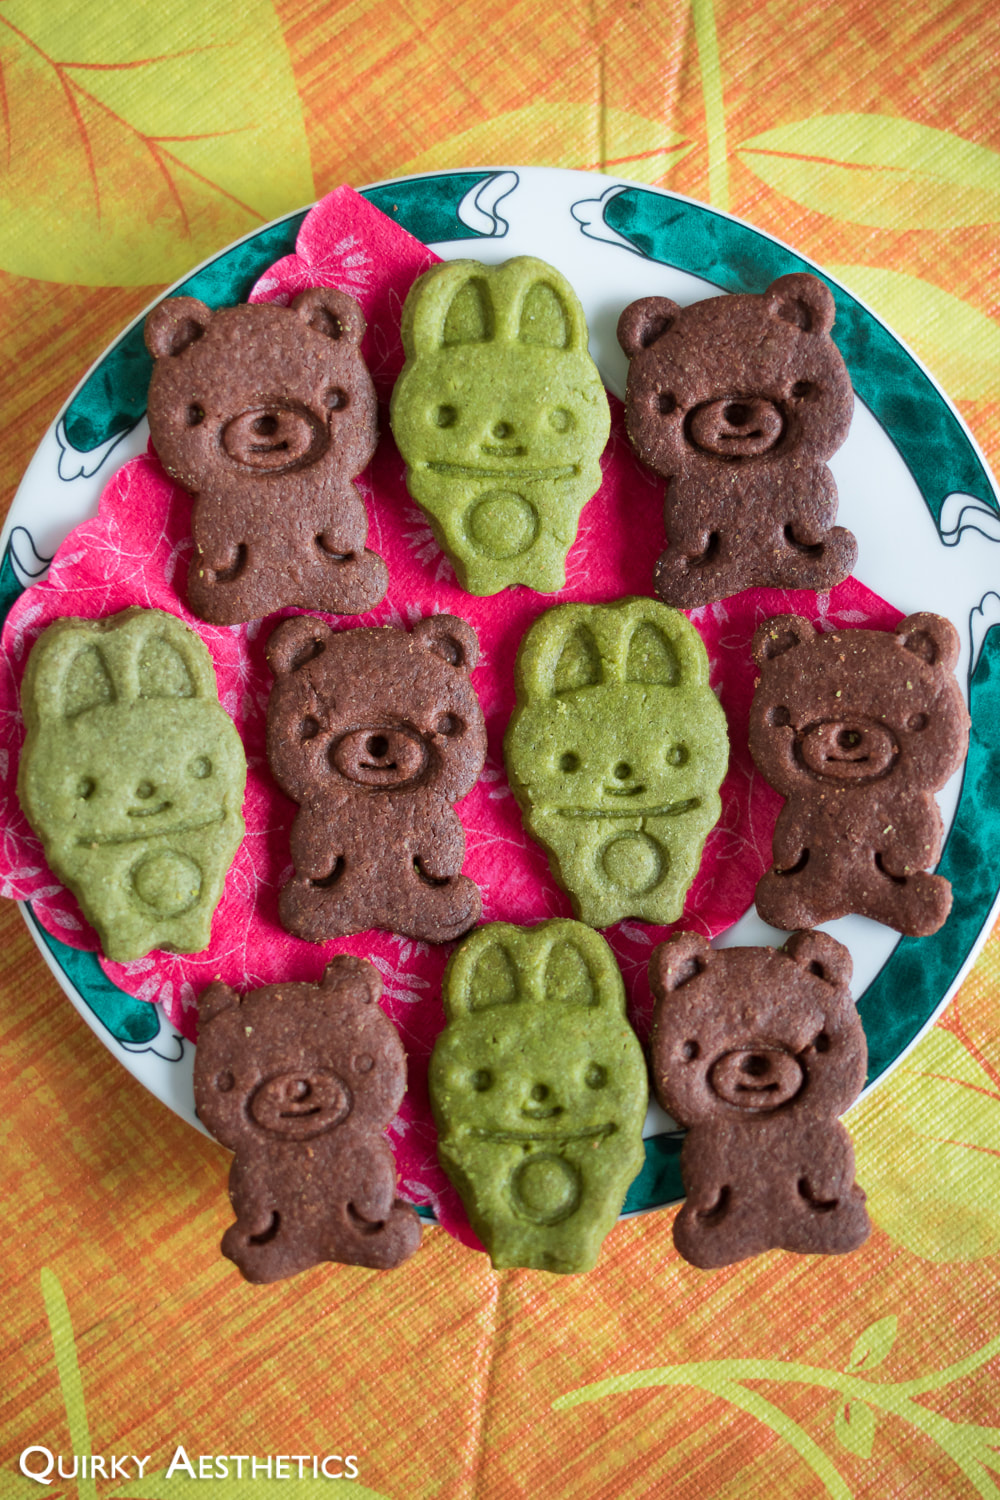
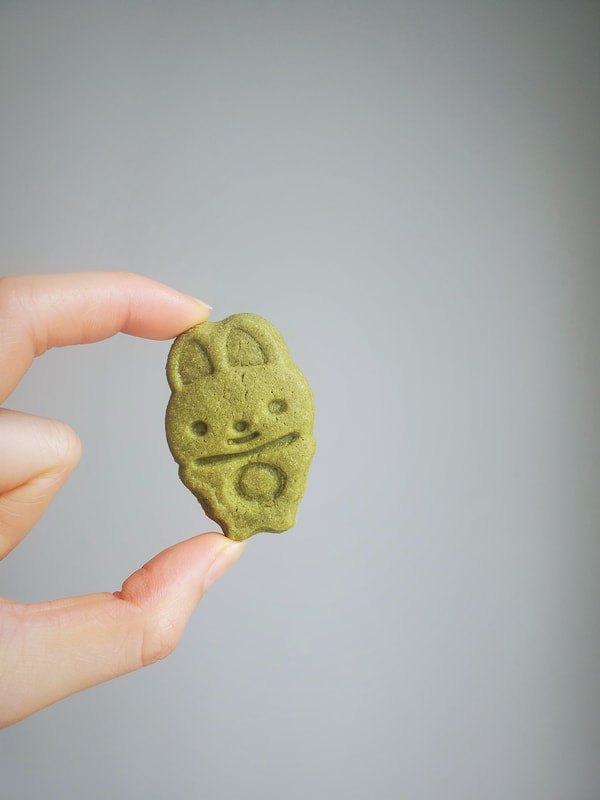
i) Matcha Sugar Cookies ("The Bunny")
- 183 g all-purpose flour
- 11 g matcha powder *
- 2 g baking powder
- 80 g granulated sugar
- 112 g unsalted butter
- 0.5 egg, beaten
- 1 tsp vanilla extract
- pinch of salt

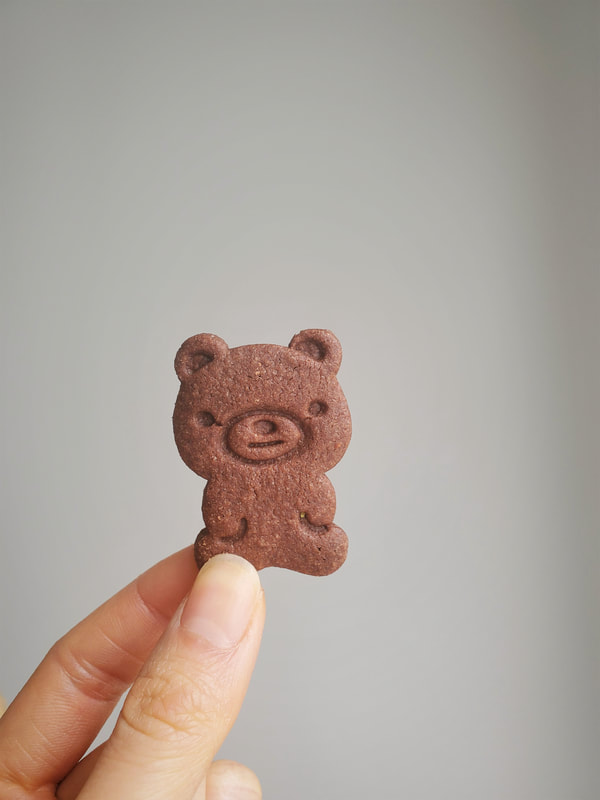
ii) Chocolate (Cocoa) Sugar Cookies ("The Bear")
-175 g all-purpose flour
- 20 g unsweetened cocoa powder *
- 2 g baking powder
- 80 g granulated sugar
- 112 g unsalted butter
- 0.5 egg, beaten
- 1 tsp vanilla extract
- pinch of salt

Directions:

The same steps apply to both versions.
​
1) Whisk dry ingredients (flour, salt, and baking powder) together in a medium bowl.
2) Beat egg in a small bowl and set aside.
3) Beat softened butter with sugar until fluffy.
4) Add in vanilla and carefully measure out half a portion of beaten egg using a digital scale. Combine well.
5) Sift in dry ingredients and fold using a spatula.
6) Once completely incorporated, let chill for 1 hour in the refrigerator. Using the freezer to quicken firming is <i> not </i> recommended in this case.
7) Remove from fridge and roll out the dough to 0.5 cm thickness. Cut shapes and stamp surfaces as desired.
8) Bake at 350 F for 15 minutes. Depending on the size of your cookies, baking time may be reduced (for smaller, daintier pieces) or increased (for larger slabs). Keep a watchful eye over the cookies and remove from oven when the edges just begin to brown.
9) Let cool for 5-10 minutes before transferring to a wire rack to cool completely. Once cool, the cookies will exhibit crispiness with undertones of earthy matcha or bitter cocoa.
10) Serve and enjoy!

Notes
- Smitten Kitchen's recipe was divided into two equal portions with a great deal of precision, with my implemented adjustments noted below:
  • The amount of granulated sugar was reduced from 100 g per batch to 80 g; this quantity was decided on to maintain the shape of the cookies while preventing an overly sweet finish.
  • The amount of all-purpose flour was reduced from 195 g per batch to 183 g and 175 g in the Matcha and Cocoa versions respectively; please keep in mind that the total weight of dry ingredients remains unaltered.

- Take care to prevent adding too much baking soda to the mix, whether intentional or not, as it will cause the cookies to puff and spread more. Consequentially, they will be more friable and susceptible to breakage. Surface stamping will also be less noticeable.
- Doubling the amount of egg, as I did in my first two trials, will result in a smoother surface and thicker, cakier consistency. Minimal changes to flavour were observed.​
Dealing with Dough - Warnings and Recommendations

i) Too soft/warm
  • Makes stamping difficult and cookie will not retain shape
  • Segments of dough may get stuck in the cookie cutter/stamp, ruining the overall design
  • Method of rectification: Place back into fridge to chill for 30 mins and warm up with hands prior to rolling out.

ii) Too stiff/cold
  • Cracking will occur and surface will reject stamping
  • Method of rectification: Allow the dough to warm up at room temperature, then slowly began to knead with hands to disperse body temperature until ready to roll.
1 Comment

Fluffy Matcha Pancakes

4/12/2017

2 Comments

 
After a previous failed attempt, courtesy of SteepedTea's horrendous mutant-green substance that could never possibly earn the title of "matcha", I decided to stick with a tried-and-true recipe (thanks honeykki!) and my go-to Ceremonial Matcha.

The result wasn't exactly soufflé-like, but definitely fluffy enough for my liking. Behold the final result!
Picture
Picture
Picture
Picture
Picture
Picture
Picture
Picture
Ingredients
(Recipe inspired by and adapted from honeykki)
​

- 3 egg whites
- 1 egg yolk
- 75 g granulated sugar
- 150 g all-purpose flour
- 160 ml milk
- 1 tsp baking powder
- 1 - 2 tsp matcha powder
- 1 tsp vanilla extract
- vegetable oil
- whipped cream + syrup (opt.)

Directions:

1) Whisk egg yolk and 2 tbsp (25 g) of sugar in a large bowl. Continue to combine until well incorporated and the mixture is slightly sticky and capable of forming thin ribbons.
2) Sift in flour, matcha powder, and baking soda. Mix gently.
3) Add in milk, 1 tbsp vegetable oil, and vanilla. Combine well.
4) Beat egg whites until glossy, stiff peaks form, adding 4 tbsp (50 g) of granulated sugar to the mix in three stages.
5) Gently combine the meringue into the batter in two to three additions, spooning and cutting through with a spatula.
6) Grease and heat a shallow pan over medium heat. Once the oil becomes less viscous, reduce to low-medium heat.
7) Ladle batter into the pan to form mounds approximately three to  four inches in diameter. Let cook for 2 minutes, or until evenly browned, before gently flipping over. There will be a greater number of bubbles travelling to the surface as opposed to regular pancakes; fear not, as this will simply add to the fluffiness factor.
8) Allow the reverse side to cook for 1-2 minutes. It should be able to be removed from the pan with ease.
9) Grease the pan again and continue this process until no batter remains. As the pan becomes increasingly warm, adjust the temperature of the heat accordingly to prevent burning.
10) Let cool and top with syrup, whipped cream, and/or toppings of choice.
11) Serve and enjoy!

Notes
- honeykki's original recipe utilized two eggs, separated, and 100 g of sugar; I've altered these measurements as I wished to achieve a pancake that was more airy than sweet. Unit conversions were conducted to ensure that the correct metric units were being used.
- 75 g of granulated sugar yielded a sufficiently sweet pancake for my liking, and actually nixed the need for any additional syrup. Feel free to adjust this amount according to your preference and desired topping choices.
- Greasing the pan is crucial to prevent the pancakes from losing air and shape. Those using non-stick pans may skip this step.​
2 Comments

Jasmine Tea Latte

1/3/2017

0 Comments

 
Let's try something new this time! As opposed to my regular recipe posts, I've attempted a video tutorial depicting the steps I normally take to make a green tea latte.

Despite my usual preference for DAVIDsTEA's Ceremonial Matcha, I opted to try SteepedTea.com's variation as I had received it as a gift. The results were less optimal than my regular brew and retained a lingering floral flavour more reminiscent to Jasmine Tea than Matcha. Nonetheless, the final product was still tasty.

(Please be welcome to leave constructive criticism, as videography remains a relatively unexplored field to me.)
Picture
Picture
Ingredients

- 1 -2 tsp green tea powder
- 1 cup hot water
- 1/3 cup milk *
- 1 tsp honey (opt.)


Directions:

1) Sift green tea powder into a Pyrex measuring cup (or heat-safe container of choice).
2) Add hot water and whisk with an electric frother. Should your selected type of green tea powder already contain sugar (ie. drink mixes), it will dissolve easily and will not require the use of a frother to remove lumps.
3) Add in honey to taste. Alternate choices of sweeteners such as agave or maple syrup may also be used based off of personal preferences.
4) Heat and froth milk in a Stainless steel pitcher, then combine the tea and frothed milk in a mug. Top with additional green tea powder if desired.
5) Serve while warm and enjoy!


Notes
- A 1:3 ratio of milk and brewed green tea was used to obtain the final product, however feel free to adjust the amount of water used to the dissolve the tea powder based on preference. Less water will contribute to a more intense flavour, and vice versa.
- 2% milk was utilized in this recipe, though both dairy and non-dairy milks will work equally well. It should be noted that frothing time and temperature may require minor adjustments; the resulting consistency may also vary depending the quantity and type of milk used.
- Upon dissolving my green tea powder, it was discovered that the substance was not pure Japanese matcha as the label had stated. Consequently, latte art could not be easily created. Thus, it was more accurate to describe the finished beverage as a Jasmine Tea Latte instead, especially considering that its aroma was more floral than grassy.
0 Comments

Matcha Cheese Tarts

12/9/2016

4 Comments

 
Not to be mistaken with molten cheese tarts, these indulgent pastries are more representative of a cheesecake baked in a crispy croissant shell and omit the small dosage of Parmesan typically used in Japanese-style lava tarts.

Honestly speaking, I have a fear of leaking batter, which is why it's always difficult to picture something of high viscocity turning solid once slow-baked. As a consequence of this phobia, I allowed the mixture to congeal over a hot water bath - reminiscent of forming a custard - before pouring the filling into the shell for baking.
Picture
Picture
Peachy Bunny's video served as a great guide. Those knowing me, though, will know that I have a hard time adhering to a recipe in its entirety. Eventually, my mind trailed off and found this cheese tart recipe. Combined, the methods (miraculously) yielded this successful product.
Picture
Picture
Picture
Picture
Picture
Ingredients
(Recipe inspired by and adapted from Peachy Bunny)

- 1 pkg original Philadelphia Cream Cheese (8 oz. / 226 g), softened
- 2 tbsp granulated sugar
- 3 eggs
- pinch of salt
- 1/4 cup half & half cream*
- 1/4 milk*
- 1 tbsp corn starch
- 2 tbsp matcha/green tea powder *
- 1/2 tsp vanilla extract
- 1 pkg Pillsbury original Crescent Roll (225 g)


Directions:

1) Preheat oven to 375 F. 
2) Line aluminum trays with puff pastry dough as desired. (I opted to line some in their entirety and others solely on the bottom.)
3) Beat softened cream cheese until smooth. Add in sugar and mix again.
4) Add in the pinch of salt, vanilla extract, cream, and milk. Beat lightly to combine.
5) Sift in cornstarch and matcha powder, then gently mix.
6) Add in eggs and beat until well combined.
7) Bring a small pan of water to a roaring boil, then reduce to medium heat.
8) Place matcha cheese filling over the pot of simmering water, stirring constantly as the mixture thickens.
9) Remove from heat once the mixture achieves a runny custard consistency. When lifted with a spatula, the mixture should drip back into the bowl very slowly.
10) Allow the mixture to rest for 1-2 minutes before carefully filling each puff pastry-lined tin. Gently drop on a sturdy surface to remove any air bubbles.
11) Bake for 10 minutes, or until the edges of the puff pastry become a rich copper shade. Let cool on a wire rack, then refrigerate. Allow the tarts to chill for at least 4 hours.
12) Serve and enjoy!


Notes
- I commited the dreaded mistake of baking my puff pastry tart shells once before pouring in the filling. As a result, the shell drastically puffed up and was required to be flattened before the second baking process. When using storebought puff pastry, I would recommend baking at the same time as the filling to prevent burning.
- Both cream and milk were utilized in this recipe, however it should be noted that either form of dairy is fine. The type of milk (1%, 2%, or whole) can be varied to your preference. If substituting with skim milk though, please add a splash of cream to maintain the required fat content.
- As opposed to Peachy Bunny's rendition, I opted to use a much smaller amount of matcha powder. Personally, I found that two tablespoons' worth was sufficient in obtaining the desired flavour and colour intensity, but feel free to adjust this amount to suit your preferences.

4 Comments

Matcha (Japanese Green Tea) Tiramisu

12/11/2014

0 Comments

 
During my Taiwan trip, I invested in quite a bit of matcha powder. And unfortunately, it expires quite soon.

So what better way to use it up than be creating a Matcha Tiramisu? (Read: Matcha Sponge Cake soaked in Matcha Syrup + Matcha Mascarpone Layer + Matcha Dusted on Top)
Picture
Picture
I decided to bake a matcha sponge cake as the weather outside is truly frightful and swinging by Loblaws to acquire ladyfingers isn't really an option I would find pleasure in choosing. The cake came out a bit more crumbly than I had hoped, so perhaps ladyfingers would have been a better option after all (?). During the assembly process, I also realized that I required a substantially larger amount of mascarpone in order to produce distinct layers in the cake.
Those would probably be two aspects I would recommend altering if you are to try to recipe for yourself =)
Picture
Picture
Picture
Ingredients

Matcha Sponge Cake (Adapted from Cooking with Japanese Green Tea)
- 2 eggs
- 1/2 cup milk
- 1/2 cup granulated sugar
- 1/2 all-purpose flour*
- 1 tbsp Uji matcha*
- 1 tbsp Izu matcha*

Matcha Mascarpone Cheese Mixture
- 300 g mascarpone cheese*
- 1-2 tbsp Uji matcha*
- 1/3 cup granulated sugar
- 1 drop of blue-green food colouring (if desired)*

Matcha Syrup
- 2 tbsp uji matcha
- 1 chunk of yellow lump rock sugar
- 1 cup of water

Directions:

The cake will be prepared in four steps:
i) Sponge Cake
ii) Mascarpone Mixure
iii) Syrup
iv) Assembly

Part i: Sponge Cake
1) Preheat oven to 355 F.
2) Separate the eggs, placing the yolks in a large bowl and the whites in a medium-sized bowl. Beat the egg whites until stiff peaks form. Then beat the egg yolks slightly; they should become paler in colour, but yet to reach a ribbon-like consistency.
2) Sift in sugar and matcha and mix well.
3) Sift in the flour and add in the milk. Combine again.
4) Gently fold in the meringue, adding in one third of the mixture to the batter at a time.
5) Pour into a greased loaf pan and bake for 15 minutes. Remove the cake and cover the top with aluminum foil if it begins to dry out.
6) Lower the temperature to 325 F and bake for another 5-7 minutes.
7) Remove from the pan and let cool.

Part ii: Mascarpone Mixture
1) Combine sugar and mascarpone, and mix until well combined.
2) Sift in matcha powder and mix again.
3) If desired, add in a drop of food colouring to enhance the colour of the mixture.
4) Cover and set aside in the refrigerator.

Part iii: Matcha Syrup
1) Place the lump sugar and matcha in a saucepan. Fill with water and heat until completely dissolved.
2) Let cool and set aside in the refrigerator until chilled.
3) Alternatively, the syrup can be made by adding hot water to the lump sugar and matcha in a microwaveable bowl and mixing until fully dissolved.

Part iv: Assembly
1) Cut sponge cake until an even number of slices, each roughly 3/4 inch in thickness. Further halve each slice to create strips of cake.
2) Saturate each strip with the matcha syrup and line the bottom of a shallow dish using half of the strips. Smooth half of the mascarpone mixture on top. Continue this process with the rest of the sponge cake strips and mascarpone.
Dust the top with a thin layer of matcha powder.*
3) Chill until ready to serve.

Notes
- Feel free to use any type of all purpose flour (white, enriched, etc.) except whole wheat; the wheaty bits will be difficult to seamlessly incorporate into the batter, thus weighing the cake down.
- For this cake, I have utilized two different grades of matcha: Uji (from Japan) and Izu (from China). These are the types of matcha that I currently have on hand, however, it is not imperative to use two different varieties in this recipe. Feel free to substitute with whatever grade of matcha you are able to find.
Also, feel free to add more (or less) matcha for a stronger/more subtle taste. I personally prefer a stronger taste, which is why I added a little over one tablespoon of each type.
- I used mascarpone from Silani, but again, feel free to choose whichever brand you desire to work with.
- To enhance the colour of the mascarpone cheese mixture, I added a hint of blue food colouring. However, I would advise adding a little less than this amount (or skipping the step altogether) as the resulting hue appeared a tad too artificial for my liking.
- It is up to your discretion to dust the top of the tiramisu with matcha powder prior to refrigerating or prior to serving.
0 Comments

2-Minute Single Serving Wake-Me-Up Brownie

10/6/2013

0 Comments

 
What is one to do when she has a major brownie craving and her dad forgets to bring back low fat two-bite brownies for her when he goes grocery shopping?
The answer is simple: She gets creative and makes her own! =]

Mr. Brownie Pacman is super-easy to whip up, supplies you with a boost of energy, and is vegan to boot!
Picture
Excuse my extremely amateur photoshop job - but I honestly thought that this would be the best way of presenting this recipe xD

Ingredients
- 2 tsp unsweetened cocoa powder
- 1/3 tsp matcha powder
- 1/2 tsp coffee granules
- 1 tbsp cake flour
- 1 tbsp mochi/glutinous rice flour
- 3/4 tsp baking soda
- 1 tsp apple cider vinegar
- 1 tbsp granulated sugar*
- 1.5 tbsp half & half cream
- 2 tbsp water
- 3/4 tsp vanilla extract

Directions:
1) Sift powders together and add coffee granules. Mix well.
2) Add in all wet ingredients. Mix until well combined.
3) Pour into greased microwave-safe bowl and microwave for 1 minute. *

Notes
- For this recipe to be fully vegan, switch up the sugar for raw honey or raw cane sugar.
- Cooking time will differ depending on your microwave wattage and make; I used a 1200 W Panasonic one.

Nutrition:
(Based on the ENTIRE recipe)

Total Calories: 152.3
Fat:  3.0 g
Cholestrol: 7.5 mg
Sodium:  1267.9 mg
Carbohydrates: 29.4 g
Fibre:  1.7 g
Sugars:  13.1 g
Protein:  2.6 g
0 Comments

Matcha Yuzu Cheesecake Ice Cream

9/11/2013

0 Comments

 
Matcha Yuzu Cheesecake Ice Cream. Well, that was a mouthful wasn't it?

But a mouthful worth saying, and a mouthful worth making in my opinion. It's low carb and high protein and well worth the effort. Oh, and for the record, these photos don't nearly it enough justice =P

Let's start! =)
Picture
Picture
Picture
Picture
Picture
Ingredients
- 250g light cream cheese, softened
- 5-6 tbsp yuzu jam
- 100 cc water (Feel free to add less/more than this amount)
- 3 tsp granulated sugar
- 1 tsp matcha powder (opt.)
- about 1 tbsp chocolate shavings (opt.)
- 1 packet of Knox unflavoured gelatin powder
- 1 tsp of cornstarch

Total Cooking Time: about 8 hours
Active Cooking Time: 25 minutes
Difficulty: Easy

Makes about 2.5 cups.

Directions:
1) Beat softened cream cheese with sugar and yuzu jam until fully combined. Gradually add water in small amounts to ease combining of the mixture. (I added enough just enough water to reach the consistency of pancake batter.)
2) Whisk in matcha powder and chocolate shavings if using. Beat to combine once again.
3) Mix cornstarch with 1 tbsp of water and add to the mixture. Beat to combine. Place over a bain-marie, stirring constantly until the mixture has thickened.
4) Remove from heat and let cool to room temperature.
5) Mix gelatin powder with 2 tbsp of water. Stir until completely dissolved and add to the mixture. Combine well.
6) Refrigerate mixture for about 4 hours.
7) Pour mixture into ice cream maker and process according to manufacturer's directions.
8) Serve and enjoy!

Notes:
- To describe the flavours present in this concoction of an ice cream mixture, I'd have to say it's quite an acquired taste. I rather loved the tanginess of the yuzu combined with the creaminess of the cream cheese, mixed with a slight hint of bitterness from the matcha. My mom was also fond of the flavour. My dad on the other hand, however, wasn't. So keep in mind that this is mix is definitely not your run-of-the-mill ice cream flavour.
- Some medications cannot be taken in conjunction with citrus fruits such as yuzu and grapefruit. Please be aware of this before serving to an individual that may be taking such medications.

Nutrition:
(Based on the the ENTIRE recipe)

Total Calories: 737.8 cal
Fat:  41.7 g
Cholestrol: 125 mg
Sodium:  875 mg
Carbohydrates: 46.6 g
Fibre:  0 g
Sugar:  39.8 g
Protein:  29 g

0 Comments
    The Sweet
    The Savoury

    Archives

    July 2020
    March 2020
    January 2020
    April 2019
    August 2018
    June 2018
    April 2018
    February 2018
    December 2017
    November 2017
    August 2017
    July 2017
    May 2017
    April 2017
    February 2017
    January 2017
    December 2016
    April 2016
    March 2016
    October 2015
    September 2015
    July 2015
    January 2015
    December 2014
    June 2014
    March 2014
    February 2014
    January 2014
    December 2013
    November 2013
    October 2013
    September 2013
    August 2013


    Categories

    All
    Brownie
    Chocolate
    Christmas Recipes
    Easy Recipes
    Gluten Free
    High Fibre
    High Potassium
    High Protein
    Ice Cream
    Japanese Style
    Low Carb
    Low Cholestrol
    Low Fat
    Low Sodium
    Matcha
    Microwave Recipe
    Quick Recipes
    Savoury Recipes
    Sweet Recipes
    Vegan
    Vegetarian
    Yuzu


    RSS Feed

WHAT DOES "QUIRKY AESTHETICS" MEAN?

Quirky =  a term that commonly refers to something/someone distinctly different and unique
Aesthetics = the visual aspect of things


Together, Quirky Aesthetics refers to the things, events, and happenings seen and perceived by this blog's creator - quirky perspectives in a visual form.

Contact ME

​Subscribe

Join our mailing list today!
Join Now
© Quirky Aesthetics. All rights reserved. Last modified: August 10, 2015.